• December Turning Challenge: Tree! (click here for details)
  • Congratulations to José Esteban Cruz"Rocking Horse" being selected as Turning of the Week for December 16, 2024 (click here for details)
  • Welcome new registering member. Your username must be your real First and Last name (for example: John Doe). "Screen names" and "handles" are not allowed and your registration will be deleted if you don't use your real name. Also, do not use all caps nor all lower case.

Little Ripper vs Grizzly Log Sled

Joined
May 30, 2022
Messages
301
Likes
301
Location
Belchertown, MA
If anyone has used either of these, I would love to hear your experience with it. If anyone has the Grizzly setup, Could you give me an idea of how big it goes, and what is the length of the rails that attach to the bandsaw, and how long is the piece the log sled slides on?

I'm getting frustrated with the small size of the table on my bandsaw. I have a 1990's 14" Delta with riser and 2hp motor. I was considering moving up to new saw, but I'm seeing that the tables on anything under ~$3k are not much bigger than what I have. An inch or two at most. in addition, they mostly come with roller guides. After my experience with the Carter roller bearings upgrade, I'd like to stay with rub blocks. The roller bearings were noisy, gummed up a lot, and were quite fiddly to get adjusted properly. The Laguna uses ceramic guides, but I'm afraid to buy Laguna due to the poor customer service. I don't see any rub block guides offered as retrofit for other bandsaws (like the Rikon 18" professional). To top it all off, I'm not sure how I would get a 3 or 400 pound bandsaw down the cellar stairs. Would need to do quite a bit of disassembly. So now I'm considering making a bigger table. The only sticking point is I use the rip fence a LOT, so I would need to find a way to lengthen my rip fence. I could not find any off the shelf kits for a larger table with rip fence, and the aftermarket rip fences don't seem as nice as the one I have.

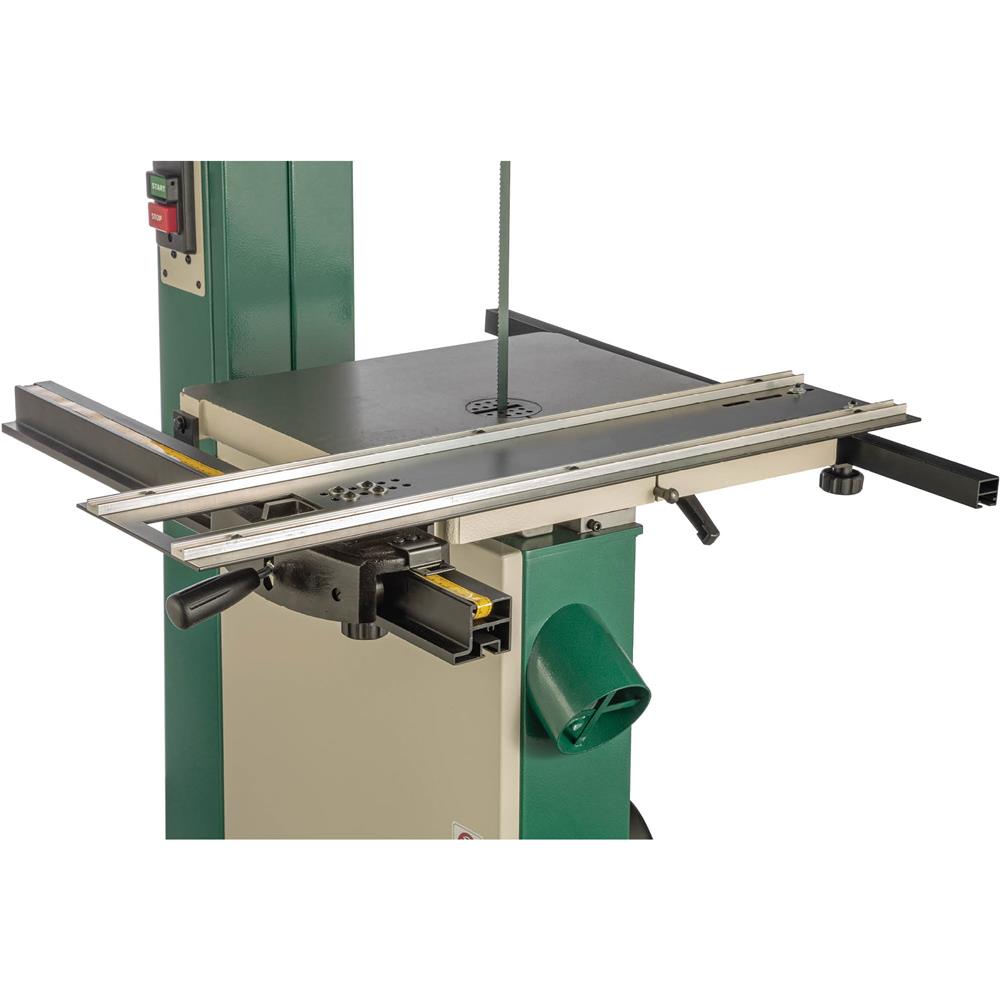
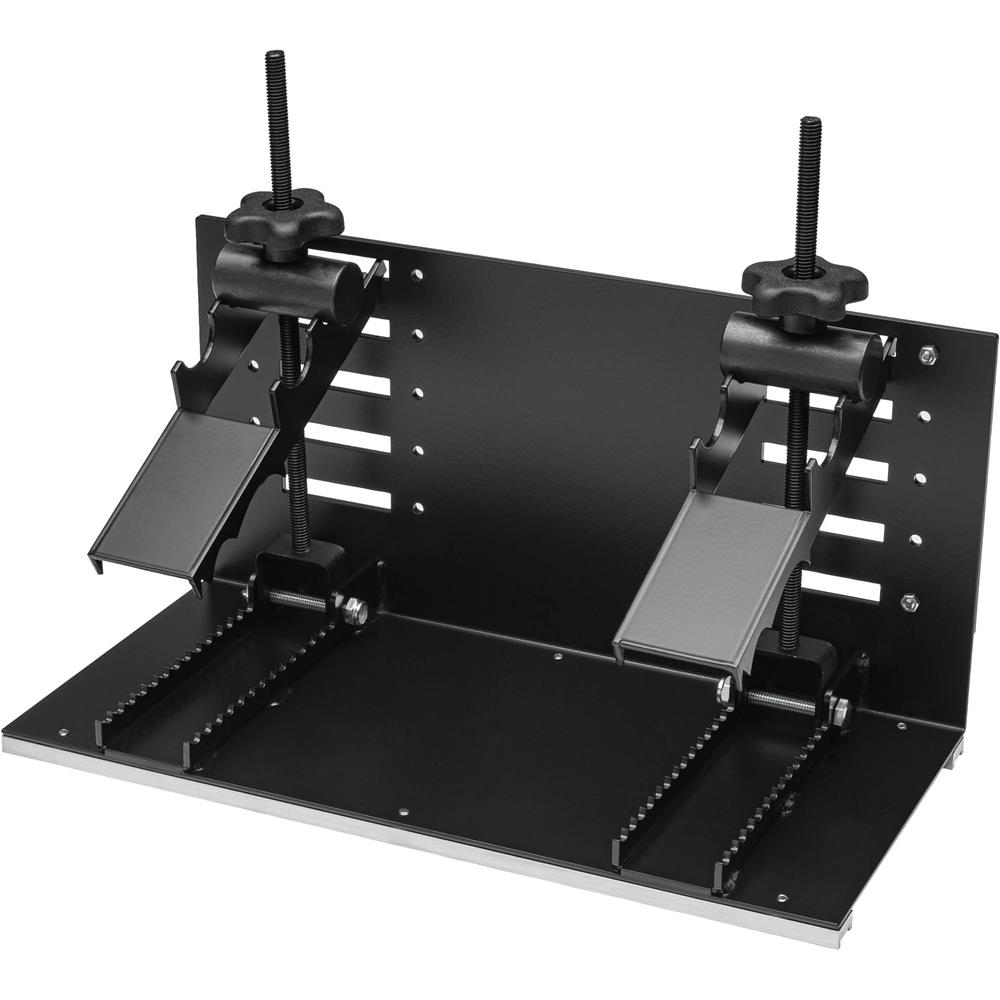
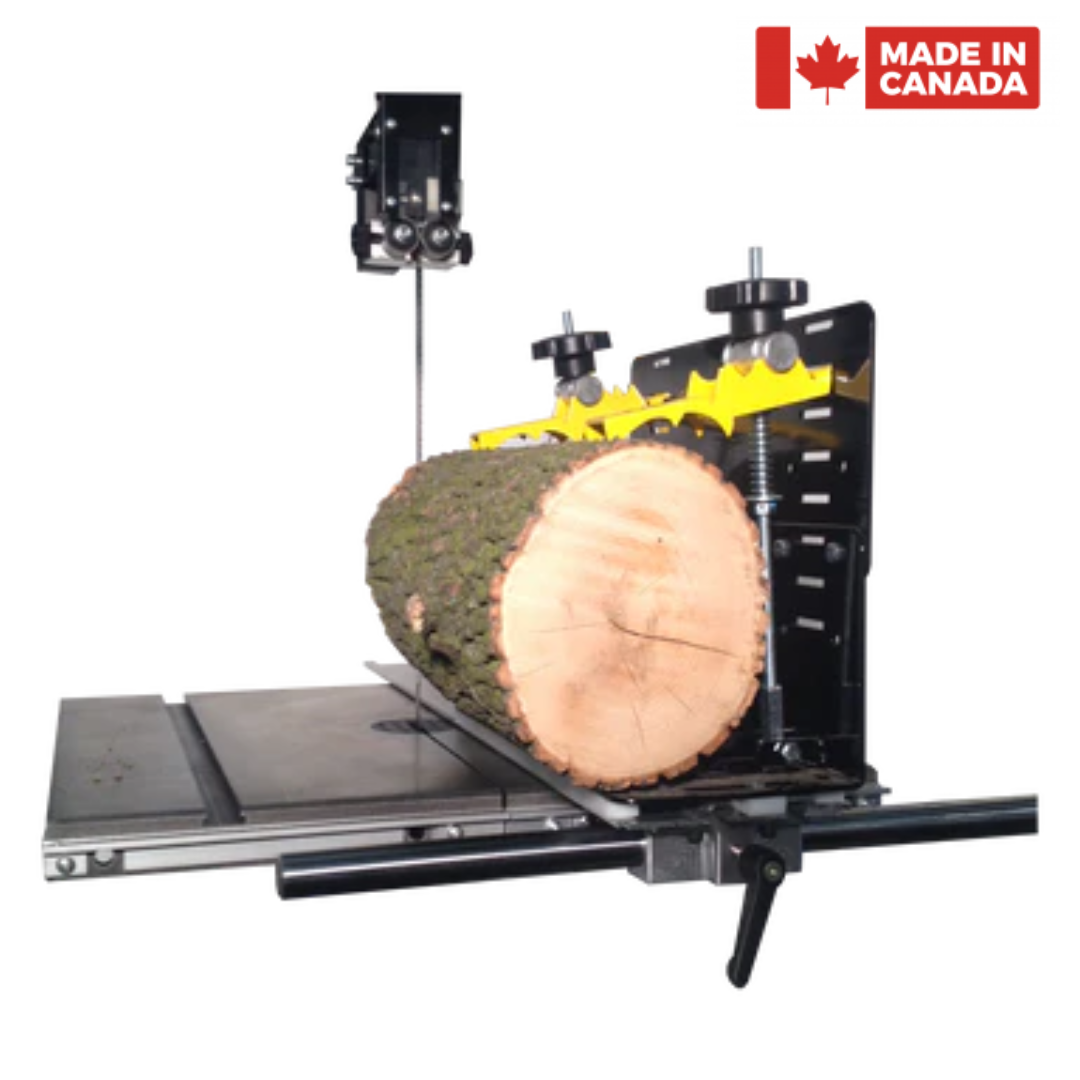
This has led me to look at the Littel Ripper or Grizzly Log Sled as a solution to my problem. It's really when dealing with chunks of logs that I have the issue with the smaller table, and both of these are designed for just that. The actual log gripper part looks almost identical on these two, and cost is similar but there are some other differences:
* The little ripper offers extensions to work with both larger diameter and length. Up to 8' long and 14" diameter. The Grizzly web site does not say how big it can go in length OR diameter.
* The "Universal Rails" on the Little Ripper would allow me to use my existing rip fence. but without expanding the table. The Grizzly rails look like they are longer, and would allow me to add a couple inches on each side and front of the table using the rails as support, but I would need to use the Grizzly sled as a rip fence. I'd lose the micxro adjustment that I have on my existing fence. I don't do any resawing, so the height is not a problem.

Here is a link to the little Ripper:
Here is a link to the Grizzzly rails:

and the Grizzly Log gripper:

Obviously, this would be MUCH cheaper than a new bandsaw, and would still be useable if I did upgrade the saw in the future.

Thanks!
 
Joined
May 26, 2018
Messages
69
Likes
59
Location
Houston, TX
If anyone has used either of these, I would love to hear your experience with it. If anyone has the Grizzly setup, Could you give me an idea of how big it goes, and what is the length of the rails that attach to the bandsaw, and how long is the piece the log sled slides on?

I'm getting frustrated with the small size of the table on my bandsaw. I have a 1990's 14" Delta with riser and 2hp motor. I was considering moving up to new saw, but I'm seeing that the tables on anything under ~$3k are not much bigger than what I have. An inch or two at most. in addition, they mostly come with roller guides. After my experience with the Carter roller bearings upgrade, I'd like to stay with rub blocks. The roller bearings were noisy, gummed up a lot, and were quite fiddly to get adjusted properly. The Laguna uses ceramic guides, but I'm afraid to buy Laguna due to the poor customer service. I don't see any rub block guides offered as retrofit for other bandsaws (like the Rikon 18" professional). To top it all off, I'm not sure how I would get a 3 or 400 pound bandsaw down the cellar stairs. Would need to do quite a bit of disassembly. So now I'm considering making a bigger table. The only sticking point is I use the rip fence a LOT, so I would need to find a way to lengthen my rip fence. I could not find any off the shelf kits for a larger table with rip fence, and the aftermarket rip fences don't seem as nice as the one I have.

This has led me to look at the Littel Ripper or Grizzly Log Sled as a solution to my problem. It's really when dealing with chunks of logs that I have the issue with the smaller table, and both of these are designed for just that. The actual log gripper part looks almost identical on these two, and cost is similar but there are some other differences:
* The little ripper offers extensions to work with both larger diameter and length. Up to 8' long and 14" diameter. The Grizzly web site does not say how big it can go in length OR diameter.
* The "Universal Rails" on the Little Ripper would allow me to use my existing rip fence. but without expanding the table. The Grizzly rails look like they are longer, and would allow me to add a couple inches on each side and front of the table using the rails as support, but I would need to use the Grizzly sled as a rip fence. I'd lose the micxro adjustment that I have on my existing fence. I don't do any resawing, so the height is not a problem.

Here is a link to the little Ripper:

Here is a link to the Grizzzly rails:

and the Grizzly Log gripper:

Obviously, this would be MUCH cheaper than a new bandsaw, and would still be useable if I did upgrade the saw in the future.

Thanks!
Mike,

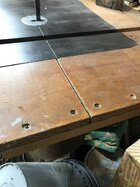
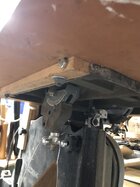
My BS is likely similar to yours but a few decades older — it’s a Rockwell 14” with a riser block installed that I designed and had fabricated. I used a piece of 3/4” MDO plywood (any good, flat 3/4” plywood would work) that I very carefully cut a hole in the center of to exactly match the lines / sizes / slight offsets of the perimeter of the table (particularly at the corners of it). I bolted a couple hardwood runners to the ‘front’ and ‘back’ of the table (using holes that were already there) and used them to bolt my table extension to, with countersunk bolts. During the initial dry-fitting of the whole assembly, I used a long straightedge to carefully project a continuation of the miter slot onto the plywood, then took it to the table saw and ploughed out a dado from front to back for the miter gauge. There’s also a cut through the plywood on the right side, lined up with the slit in the table, to allow for changing blades. I have a short piece of hardwood screwed across the cut on the underside of the plywood top to keep those two surfaces aligned. I just remove three of the screws and rotate the strip out of the way when it’s time to change a blade and replace them when the new blade is in. The slots across the front and back allow me to put a homemade fence on the table (sorry, I don’t have a photo of it) that’s held in place with a couple star knobs. The fence is totally customizable for whatever I’m cutting, including logs.

Because my extension top is flush with the original table, I don’t lose any cutting height, like you would with an extension table set on top of the existing table.

It has proven to be well worth the time I put into building it.

Lastly, I strongly suggest you watch the video that JKJ posted a few days ago on getting blanks from logs. It’s quite well done and shows that you don’t need to buy a sled to do what you want to do. Several years ago I had the good fortune to be able to visit John and I can tell you he has an incredible collection of turning blocks of many, many woods in many different sizes and shapes. I brought him some mesquite and he sent me away with lots of pieces of wood we don’t have in Texas! I think I got the better end of the bargain ;)

IMG_8532.jpeg

IMG_8531.jpegIMG_8530.jpeg
 
Joined
May 30, 2022
Messages
301
Likes
301
Location
Belchertown, MA
@Walter Mooney ,

I saw the video posted by @John K Jordan. On the same day the drive pulley on my saw loosened up and damaged the belt guard. It what got me thinking about a new saw. I picked up a few good pointers, but none that helped with my biggest problem which is the log halves wanting to fall off the edges of the too small table. Always feels very dangerous at the end of a cut with the end of the log hanging off the table. If I let go of the wood it could fall to the floor. If I don’t let go I can’t turn off the saw. He doesn’t seem to have the same problem. This led me to look at his bandsaw. It’s on Black Friday sale. About $2500 with shipping, mobility kit, and a couple blades. Table is about 50% bigger than mine. For $500 more the next model up has an even bigger table, plus blade brake.

For some reason I could not envision a simple table extension. I’m not set up for any flat work, and I don’t have any flat work skills. Your table looks simple enough I might be able to manage it, so I will give it a try today. 👍

Maybe I can convince myself I don’t need a new saw. :)

Thank you.
 

Dave Landers

Beta Tester
Joined
Dec 1, 2014
Messages
969
Likes
3,420
Location
Estes Park, CO
Website
dlwoodturning.com
I'm getting frustrated with the small size of the table on my bandsaw. I have a 1990's 14" Delta with riser and 2hp motor. I was considering moving up to new saw, but I'm seeing that the tables on anything under ~$3k are not much bigger than what I have. An inch or two at most. in addition, they mostly come with roller guides.

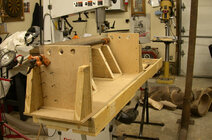
Mike, I have the same saw, and also made an extension table to keep me from having to balance logs. @Walter Mooney has a bit nicer table than mine, but I offer mine as maybe there's ideas for you:
IMG_5497.JPG

IMG_5498.JPG

Bolts onto the table where the rip fence attaches, and there's a leg down to the stand for extra support of heavy logs. I found that for cutting up logs, I just needed the extension out the side, not so much front and back.
I do have to remove the thing to change the blade - Walter had a nice option for that.
I very rarely use the rip fence, so that's not an issue for me. If I ever need a rip fence, I'd just attach a length of wood with a couple clamps.


After my experience with the Carter roller bearings upgrade, I'd like to stay with rub blocks. The roller bearings were noisy, gummed up a lot, and were quite fiddly to get adjusted properly.
Me too - my Carters (which are on the saw in the old photos above) were fiddly and gummy. They were old, (20+ years) so I don't know if newer ones have better adjustments. But I'm running the Cool Blocks (that I got before the carters) on that saw. And my bigger saw that I now use for logs is running blocks also (some plastic). I like the blocks much better.
 
Joined
Feb 2, 2016
Messages
690
Likes
557
Location
Clinton, TN
Me too - my Carters (which are on the saw in the old photos above) were fiddly and gummy. They were old, (20+ years) so I don't know if newer ones have better adjustments. But I'm running the Cool Blocks (that I got before the carters) on that saw. And my bigger saw that I now use for logs is running blocks also (some plastic). I like the blocks much better.

When I used that Delta I tried various guides and always went back to the cool blocks. I didn’t like the Carter guides.

JKJ
 
Joined
Feb 2, 2016
Messages
690
Likes
557
Location
Clinton, TN
but none that helped with my biggest problem which is the log halves wanting to fall off the edges of the too small table. Always feels very dangerous at the end of a cut with the end of the log hanging off the table. If I let go of the wood it could fall to the floor. If I don’t let go I can’t turn off the saw.

I know people who make bandsaw bed extensions both for the side and the far end of the bed. I haven’t.

When I do have a long log section that may be difficult to control after the cut, I enlist the services of a helper to hold the far end to keep it from tipping towards the floor.

The biggest problem with a helper is they sometimes think they are helping if the pull on the long log! I have to educate them - don’t pull or even adjust the path of the cut, I’ll supply the push and alignment - simply support the log at table height and keep it from falling.

However, I rarely cut long log sections. I did one last night that was about 25” long, about my limit on that saw working alone. When I really want longer blanks, I have a Woodmizer behind the barn! I make a jig with a fence if needed from 2x lumber to hold special sizes - cut right through the jig. But mostly I stick to log sections 16” long or shorter.

If I have a big round (flat on the bottom) I want to make big blanks from and it’s not too wide for the table, I sometimes cut it 1/2 way then walk around to the back of the table and pull the rest of the way - that way I can support the far end myself.

And for ripping long log sections, the method I briefly showed in the video of attaching boards to both sides of the log works like a charm! WIth this method, the log is always perfectly stable for a rip cut and even if long, I can stop anywhere and not worry about using wedges and such to keep it from rolling, and walk around the saw to finish with a pull cut.

The board support method also has a couple of other advantages: one, you don’t have to cut down the pith - you can make the first cut off to one side, difficult owhterwise, and end up with a flat side that can rest on the table for the next cut. (Can sometimes get bigger blanks that way.

Also, the board can rest against the fence during the rip which makes the cut perfectly straight! I didn’t have time to cover all this in the video (they wanted me to keep it to 45 minutes for the demo and I didn’t want to cut out things like safety!)

I also didn’t have time too cover the many subtle aspects of drying blanks successfully - that begs for another video in itself if I can find the energy sometime! Other potential video topics on the subject - more about initial prepping with a chain saw, sharpening blades on the saw, and a favorite in my class and at demos - how to coil a long blade, into 3 loops, perhaps twice for 5 loops. I show one I coiled three times for 7 loops.

What can be REALLY tricky if you don’t know how is both uncoiling and coiling a big Woodmizer bandsaw blade safely - wear safety glasses and heavy gloves!

JKJ
 

Dave Landers

Beta Tester
Joined
Dec 1, 2014
Messages
969
Likes
3,420
Location
Estes Park, CO
Website
dlwoodturning.com
The biggest problem with a helper is they sometimes think they are helping if the pull on the long log! I have to educate them - don’t pull or even adjust the path of the cut, I’ll supply the push and alignment - simply support the log at table height and keep it from falling.
An extension table is better at following instructions :)
 
Joined
Feb 2, 2016
Messages
690
Likes
557
Location
Clinton, TN
If I added an extension table to the rear of my bandsaw I'd have to crawl under it to get from the front door/office into the main shop! I designed placement for everything before I built the shop and didn't add in an extension table. I can easily continue without, as I have for the last 15-20 years, but I'm sure it would be great for someone.

Viva la excavator, the chainsaws, and the Woodmizer.

JKJ
 
Joined
May 29, 2024
Messages
5
Likes
7
Location
Madison WI
What is your chainsaw situation? I do all the larger processing - bucking and rip cuts - with a 28" bar and that suits me just fine. The bandsaw is there to round the slabs/blanks out, and to resaw smaller platter blanks where the kerf loss from the chainsaw is undesirable.

If you have a good saw and keep the chain sharp, they really are precision instruments. My rip cuts are usually flat within 3/8" even on material 24" wide. The hardest part is getting your rips co-planar, but really this is mostly an issue on platter blank material. Larger bowl blanks can be a good bit off and it doesn't slow you down much.

The issues I see with the bandsaw are 1) handling such large pieces that warrant the large table and 2) the size and power of bandsaw that you'd need to take advantage of it. Getting much more than 14" of resaw capacity puts you into BIG saw territory. I think you'd be better off finding a small-ish used sawmill, or sticking with the chainsaw.
 
Joined
Aug 8, 2024
Messages
76
Likes
45
Location
Blairstown, NJ
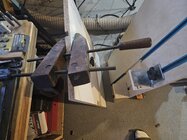
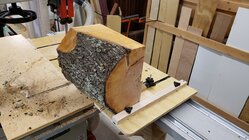
This is so odd, I was sure I responded to this thread when it was first posted. Maybe I never sent it...hmm. Regardless, I often purchase instead of make (when it comes up tools) for the sake of efficiency and getting actual work done by this is so simple and it both rips and cross cuts.

Kind of self-explanatory but I'll be happy to answer and questions.

There's a strip of hardwood underneath that runs through the miter slot. I'm working on another version for making veneer workout a fence but that's another can of worms.

1000026605.jpg
 
Joined
Jan 24, 2024
Messages
31
Likes
45
Location
Verona, WI
This is so odd, I was sure I responded to this thread when it was first posted. Maybe I never sent it...hmm. Regardless, I often purchase instead of make (when it comes up tools) for the sake of efficiency and getting actual work done by this is so simple and it both rips and cross cuts.

Kind of self-explanatory but I'll be happy to answer and questions.

There's a strip of hardwood underneath that runs through the miter slot. I'm working on another version for making veneer workout a fence but that's another can of worms.

View attachment 69400
That’s a great solution. Is there a trick to getting enough support to resist rolling?
 
Joined
Aug 8, 2024
Messages
76
Likes
45
Location
Blairstown, NJ
That’s a great solution. Is there a trick to getting enough support to resist rolling?
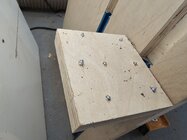
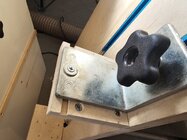
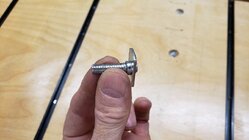
Hi Ross, here's a closeup of the pieces that hold the stock. They're basically 1" number 8 screws through 3/4" ply. Under the very worst conditions, you can still use the jig to make a small flat and then roll to the flat for the actual cut.
1000026634.jpg

1000026635.jpg
 
Joined
May 30, 2022
Messages
301
Likes
301
Location
Belchertown, MA
So yesterday I told my wife I was going to Home Depot to get mdf to make a table extension. She suggested I go to Woodcraft instead to look at a new saw. 👍

I ended up getting the Laguna 1412. The table is about 1/3 bigger than my Delta, but still not as big as the one on JKJ’s saw. I may still build a small extension, but will try without first.

I went in with the intention of getting the Rikon 18” saw, but the guys there convinced me it was not worth the extra cost. (And hassle getting it into basement)

I have heard some horror stories about Laguna service, but they told me that overall they have much fewer problems with Laguna vs Rikon or Jet.

@John Kananis , that’s the smartest log sled I have seen so far! If I do need a sled, it will look like yours.
 
Joined
May 30, 2022
Messages
301
Likes
301
Location
Belchertown, MA
@Aaron Sluis , I have an 18” Milwaukee electric chainsaw. My chainsaw skills are not great, so I just use it to cut into pieces small enough to move to bandsaw or lathe. Less than 12” long for bandsaw. I think with the new saw I will be able to go 16” long without a problem.
 
Joined
Feb 2, 2016
Messages
690
Likes
557
Location
Clinton, TN
Hi Ross, here's a closeup of the pieces that hold the stock. They're basically 1" number 8 screws through 3/4" ply. Under the very worst conditions, you can still use the jig to make a small lat and then roll to the flat for the actual cut.

Looks nice.

So do you push the back piece tightly against end of the wood then lock it down, or do you crank on the front screws as needed to grip the wood more firmly? When ripping, does this work best with both ends cut perpendicular to the log?

So far I haven't seen the need to make any kind of a jig or sled since I've done OK without for years. But I might make one to show people in my bandsaw classes who are a little wary of holding and sawing by hand. I do quickly show a couple of options in my video but another method wouldn't hurt.

With your jig as is, what is the biggest diameter you feel comfortable with when crosscutting a round?
And the biggest diameter to safely rip a flat down the side of a log section?
With no device I often cut 12" thick pieces, occasionally up to 20" in diameter, and 12" diameter log sections 24" or so long (without needing assistance)

Why are there two parallel slots with aluminum channels on the top? Is it something to do with your specific bandsaw, or does the second have some other function?

JKJ
 
Joined
Aug 8, 2024
Messages
76
Likes
45
Location
Blairstown, NJ
Looks nice.

So do you push the back piece tightly against end of the wood then lock it down, or do you crank on the front screws as needed to grip the wood more firmly? When ripping, does this work best with both ends cut perpendicular to the log?

So far I haven't seen the need to make any kind of a jig or sled since I've done OK without for years. But I might make one to show people in my bandsaw classes who are a little wary of holding and sawing by hand. I do quickly show a couple of options in my video but another method wouldn't hurt.

With your jig as is, what is the biggest diameter you feel comfortable with when crosscutting a round?
And the biggest diameter to safely rip a flat down the side of a log section?
With no device I often cut 12" thick pieces, occasionally up to 20" in diameter, and 12" diameter log sections 24" or so long (without needing assistance)

Why are there two parallel slots with aluminum channels on the top? Is it something to do with your specific bandsaw, or does the second have some other function?

JKJ
Hey John, all great questions. The screws stay in place after they're driven in to create the "cleats". I tighten the rear knob according to the length of the piece I'm cutting, then jam the front (identical to the rear) bracket against the end while I tighten that knob also. The second set of track is for ripping wider pieces so you can clamp closer to the center of the workpiece - I simply move the brackets over to the second track, the size of which, I feel, is only limited by the saw when ripping. The limiting factor in cross cuts is the height of the actual bracket, which can be replaced with whatever size bracket one would need for bigger things. There's a little play in the brackets to accommodate logs or blanks that aren't cut completely square but square does = safer.

Truth be told, I built it to handle the smaller things in the shop, like turning blanks that aren't square - I'm more comfortable with unsupported bigger stock than smaller...I spent decades carefully feeding (not flat) stock through my bandsaw (like curved leg blanks, etc) with no issues until about two years ago when the saw ripped a large chunk of walnut from my hands and sent the back end into the saw itself with enough force to make me check my shorts afterwards.
 
Joined
Feb 2, 2016
Messages
690
Likes
557
Location
Clinton, TN
I spent decades carefully feeding (not flat) stock through my bandsaw (like curved leg blanks, etc) with no issues until about two years ago when ...

I had a piece with a crack and void split one time about 20 years ago, a chunk on the right broke off, the remaining wood rotated to the right with part of the blade still embedded. It bent an "S" curve into the blade and woke me right up. That's one of the reasons I spent so much to try to cover possibilities like this in my video. I inspect the piece more carefully now and use a different method if needed. I use wedges extensively on oddly shaped pieces. If the wedges threaten to slip a bit, some hot melt glue can help.

Another thing that works to safely crosscut small rounds, even irregular branches and such (maybe up to 2.5" diam) is grip them in a big woodworkers hand screw clamp with wooden jaws. The jaws can be made as parallel as needed to grip tightly. Slide the jaws flat along the bandsaw table when cutting.

JKJ
 
Joined
Aug 8, 2024
Messages
76
Likes
45
Location
Blairstown, NJ
I had a piece with a crack and void split one time about 20 years ago, a chunk on the right broke off, the remaining wood rotated to the right with part of the blade still embedded. It bent an "S" curve into the blade and woke me right up. That's one of the reasons I spent so much to try to cover possibilities like this in my video. I inspect the piece more carefully now and use a different method if needed. I use wedges extensively on oddly shaped pieces. If the wedges threaten to slip a bit, some hot melt glue can help.

Another thing that works to safely crosscut small rounds, even irregular branches and such (maybe up to 2.5" diam) is grip them in a big woodworkers hand screw clamp with wooden jaws. The jaws can be made as parallel as needed to grip tightly. Slide the jaws flat along the bandsaw table when cutting.

JKJ
Oh yeah, hand screws are awesome. This one below lives next to my bandsaw. What video though? I think I missed something.
1000026640.jpg
 
Joined
Feb 2, 2016
Messages
690
Likes
557
Location
Clinton, TN
Oh yeah, hand screws are awesome. This one below lives next to my bandsaw. What video though? I think I missed something.

I made a video for a Covid pandemic club demo when we were meeting by Zoom only. It's a shortened version of my 4-hr bandsaw class on the same subject so I had to leave out a lot of stuff. I posted a link here in the the Tutorials/Tips section but here's the direct YouTube link (if you might want to take a look). There are a lot of little goofs and things I'd like to change but unless I find a magic bucket of time it is what it is for now! If I live long enough I'd like to do a short one on sharpening bandsaw blades, successfully drying even large green blanks, and some on a few other topics. They are fun to make but a lot of work. And I'm so bad at remembering what I want to say I had to buy a teleprompter!

View: https://youtu.be/4Rbdas-jtD0


JKJ
 
Joined
Aug 8, 2024
Messages
76
Likes
45
Location
Blairstown, NJ
I made a video for a Covid pandemic club demo when we were meeting by Zoom only. It's a shortened version of my 4-hr bandsaw class on the same subject so I had to leave out a lot of stuff. I posted a link here in the the Tutorials/Tips section but here's the direct YouTube link (if you might want to take a look). There are a lot of little goofs and things I'd like to change but unless I find a magic bucket of time it is what it is for now! If I live long enough I'd like to do a short one on sharpening bandsaw blades, successfully drying even large green blanks, and some on a few other topics. They are fun to make but a lot of work. And I'm so bad at remembering what I want to say I had to buy a teleprompter!

View: https://youtu.be/4Rbdas-jtD0


JKJ
Oh I have seen this! You shared it with me a couple of years ago maybe. Very well done! And thanks for sharing again.
 
Joined
Oct 14, 2019
Messages
165
Likes
156
Location
Savannah, Georgia
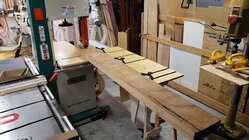
It is made using linear rails. You want the round ones, easier to work with and cheap.
Basic construction is a frame with wheels that attaches to the bandsaw with a piece of angle aluminum.
Rails are mounted to the frame top. A mounting platform from plywood is attached to the pillow blocks, the sliding table top attaches to that.
I put in T track for mounting fences, hold downs, jigs, etc.
My total travel is about 6 feet, have stops so the pillow blocks don't come off the tracks. Can saw longer than that by shifting the material and continuing the cut.
The sliding table top rests on the bandsaw table. You need a same height piece attached to the table left of the blade. This also has a piece to support the sliding table on the out feed.
These are the linear rails I used.
These are some extra pillow blocks (I used 3 per rail).\

If your interested, I can take some more pictures of the table details, may take a couple days.

A couple comments on the table and project.
For once I built something custom and it worked great out of the gate. Only did some minor tweaks.
The sliding table makes the bandsaw much safer, especially when dealing with larger, heavier wood.
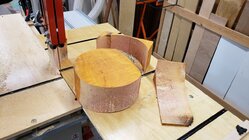
Any jig is simplified and elevated. For example to do a bowl blank cutting jig all you need a pin put into the T-Track and a stop for the table so the pin is at the blade tips. Here is a picture of my bowl blank jig:

20221112_173014.jpg
 
Joined
Oct 14, 2019
Messages
165
Likes
156
Location
Savannah, Georgia
The linear rails are mounted on aluminum and bolted to 3/4" hardwood plywood. I haven’t had any misalignment issues.

To align the rails, I used the pillow blocks and a plywood mounting plate as a guide. Starting at one end, I set the spacing, attached the rails, slid the platform down, and repeated the process until reaching the other end.

Round linear rails have some play (compared to the rectangular) and are quite forgiving, which is fine for sliding tables since they don’t require CNC-level precision.
 
Joined
May 30, 2022
Messages
301
Likes
301
Location
Belchertown, MA
@James Seyfried , is that set up just lift off the table? I like that idea.

@Steve Chaplin , love the rails. Must make it very easy to feed thru.

So many good ideas here! My head is starting to spin. I’m still hoping to hear from someone who uses little ripper or the grizzly log sled. They both have cross slide abilities. Not sure if cross slide is useful or not.

I probably won’t have time to make anything until after the holidays. Will give me a chance to see if I really need anything now I have a bigger table.
 
Back
Top