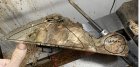
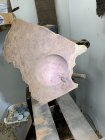
What would be your preferred method of mounting this in order to achieve a small form/bowl? Should I aim for a glue block or recess when I reverse mount it? It’s about 3.5” max in thickness.


John, I am having a hard time visualizing the wedges you're talking about? Do you have a photo?
Think of them serving the same function as the rubber stoppers on Jumbo jaws

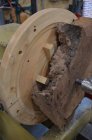
Most of those I have done with very little turning on the outside. I turn the inside first. Then make a jam chuck and put the piece on that with the tailstock in place then i can turn the outside if necessary. I often use a vacuum chuck but if your new to turning you probably don't have one of those. Once you've turned 90 percent of the bottom you can use tape or stretch wrap to hole the bowl to the jam chuck and remove the tailstock to turn the rest. I have done it back wards. Hot glue the flat side to the faceplate to the the bottom first. Sometimes you still have to use shims to fasten it to the faceplate securely and I would always use the tailstock as long as possible.
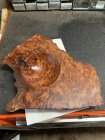
Here’s the next question- what would you finish it with, and why?
I have Formby’s satin and gloss tung oil “finish” currently.