Odie
Panning for Montana gold, with Betsy, the mule!
(This will work for any sharpening system similar to the Wolverine, as well.)
My way of matching any existing grind on a bowl gouge to the grinder wheel is very simple, and very easy to do. You can duplicate the exact positioning in seconds.
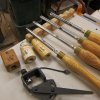
First, notice that I use three depth gauges for positioning the nose depth of the gouge into the Vari-grind jig. They are marked A, B, and C. (The depths are 1 1/4", 1 11/16", and 2 1/2")
Next, notice that the Wolverine Vari-grind jig has markings on the indicator notches #1 through #7.
Finally, see that there is a piece of masking tape on the gouge tool shaft next to the brass ferrel. On this piece of masking tape there is a letter and number that corresponds to the grind on that particular gouge. For example, the first gouge, an Ellsworth grind, is marked: "C-4". For this gouge I use depth gauge "C" to position the gouge into the Vari-grind jig, which is set to notch #4.
After setting the gouge into the jig, and setting the corresponding notch, I place the jig into the "V-arm" and visually match the wheel to the bevel of the grind by looking from the side while adjusting the length of the V-arm.
It's ready to grind.
All this takes me about 15 seconds to do.......real quick.......no other set-up jigs are necessary.....like that raptor, or similar jigs. All these other jigs do is set the V-arm to a theoretical angle that doesn't take into account the two critical settings on the Vari-grind jig. What I'm showing you exactly matches all the variables to the existing grind you already have on your gouge.
You'll notice the third gouge is simply marked with an "X". This is my way of telling myself this gouge doesn't use the Vari-grind jig.......but, has a standard straight grind. This is done by placing the butt of the handle in the crook of the "V-arm" and rotating it on the axis of the tool.
The fourth gouge, marked "5-A", has a very blunted angle and is similar to Mahoney's "bottom feeder" gouge for a very angled approach to bottom interior of bowls.
I have, at one time or another, tried all the jigs, and methods of organizing gouges for sharpening...........and, this is what I've evolved to. I think that I'm the originator of this concept, or system of doing it, so I'm now showing you how it's done. This is not to say my way of doing it should be, or will be the choice of other turners, but a few of you might try it, like it, and decide to adopt this method. There are benefits of speed, simplicity, and preciseness that are helping me in my own turning, but I am an individual with an individual's outlook and needs, that doesn't expect everyone to see, realize, and understand the benefits that I have found in this method.........
ooc
Attachments
Last edited:

