
Greetings-Though it has been and remains an enlightening part of my wood-turning journey to learn a variety of reverse-holding solutions for finishing bowl bottoms, platters and lidded boxes, etc., (Longworth chuck, various home-made friction drives and jamb chucks), I have an order of very nice brushed copper signature medallions with my logo coming to add a touch of class to my bowl and platter bottoms. (If you saw my chicken-scratch efforts with archival ink or pyrography, you would applaud this move lol! And don’t even start me ranting about the cheap Chinese branding iron I got from Etsy!). Anyway, for that to work, I obviously require unimpeded access to bottoms with the tail-stock out of the way to turn the recess for the medallion as a last step, which means a vacuum chuck.
That said, I have never set up anything like this before and don’t have the extensive shop and fabrication experience to know my way around all the component parts like many of you. I have perused websites including this one, and YouTube videos quite a bit, but I’m still confused and unsure how to proceed. I know many of you are old PowerMatic hands, and no doubt some of you have rigged up vacuum systems for the various 3520 models.
I would be grateful for any advice and links regarding components needed for the set-up, assuming I know next to nothing about all of this.
What else am I not thinking about? I’m sorry for all the questions, but I really have zero experience setting up something like this. As for how much I can spend, I definitely believe in the adage “Buy once, cry once,” though I would also love to economize where possible. I know I can expand cup sizes later if needed.
Thanks in advance for your expertise! My 1st spring craft shows are in March, and I would LOVE to have some nicely-finished bottoms with my copper medallion ready for my table with your help! Aaron
That said, I have never set up anything like this before and don’t have the extensive shop and fabrication experience to know my way around all the component parts like many of you. I have perused websites including this one, and YouTube videos quite a bit, but I’m still confused and unsure how to proceed. I know many of you are old PowerMatic hands, and no doubt some of you have rigged up vacuum systems for the various 3520 models.
I would be grateful for any advice and links regarding components needed for the set-up, assuming I know next to nothing about all of this.
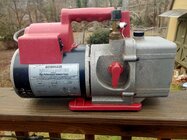
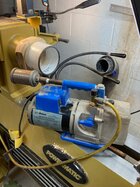
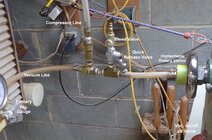
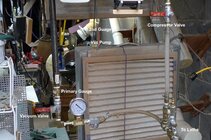
- Vacuum Pump: I already have an older RobinAir Vacum Master Model 15400 vacuum pump that is rated 1/3hp and 4cfs that I took in trade for stabilizing small blanks that I haven’t gotten around to using(pic attached), as well as a California Air Tools air compressor that is rated at 3.10 CFM at 40 PSI and 2.20 CFM at 90 PSI (so possibly not enough?). I assume if I go with the RobinAir that it needs an intake filter and one for the oily exhaust coming out of the handle hole? Where do I get those? And this may be a stupid question, but does the line from the manifold assembly on the lathe connect to that intake? It generates suction when turned on.
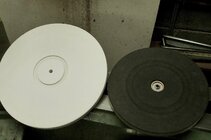
- Vacum chuck cup: I know I need the actual vacuum cup. I am inclined to spend a bit more for an aluminum/metal model because I hear they run truer with less vibration? If I only have the money to start with one, should I get one about 4-5 inches in diameter? The majority of my bowls and platters are probably between 7 to 13 inches in diameter.
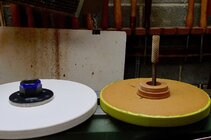
- Reverse Centering: I know I need an adaptor to flip the chuck around for re-centering. What is the best option for this?
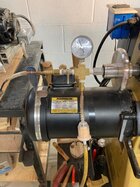
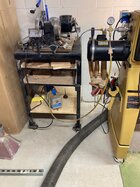
- Manifold/lathe interface: I know/am pretty sure I need a manifold kit that attaches to the hand-wheel tube with a valve and vacuum gauge.How does it attach, and can I retain the handwheel (which I like and use a lot)? I see what looks like a complete kit on https://www.frugalvacuumchuck.com/home.html. Is this what I need, and does it contain everything needed to attach on both ends?
- What kind of line and fittings do I need between the pump and the manifold? (Maybe this is all contained in #2 if I just buy the whole kit?).
What else am I not thinking about? I’m sorry for all the questions, but I really have zero experience setting up something like this. As for how much I can spend, I definitely believe in the adage “Buy once, cry once,” though I would also love to economize where possible. I know I can expand cup sizes later if needed.
Thanks in advance for your expertise! My 1st spring craft shows are in March, and I would LOVE to have some nicely-finished bottoms with my copper medallion ready for my table with your help! Aaron


")


")
