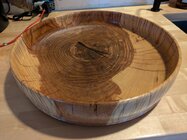
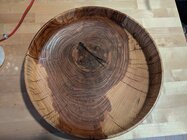
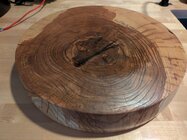
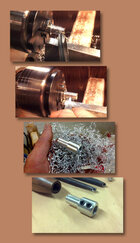
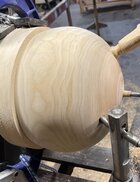
One species that might work for end grain cookie turnings is sassafras - fairly stable. I've cut and dried some large pieces without cracking.
There is a proven way to minimize drying defects in any green wood:
boiling the wood. Typically, a piece would be rough turned then boiled for about 1 hr per inch of thickness. There's an old thread here about boiling:
I tried the search menu on this site but not getting anywhere. What is the proper way to boil wood and/ or freeze wood so to get the moisture out. I have been using dishwashing soap ( costco brand) and its fine but turns my turnings slightly green. I want to build a steel pot / burner in the...

www.aawforum.org
Some things about boiling from two sources.
At one time I got some big exotic wood blanks from the now deceased exotic wood exporter Jim King from Peru. Jim told me some of them HAD to be boiled or they would quickly become useless. He assumed I wanted to turn large things, but instead I cut them up into small pieces which dried OK without cracking. Jim said they exported thousands of bowls from Peru and boiled all of them, in 55gal drums, over wood fires.
Turner/teacher/writer Stephen Russell used to have a great web site with a lot of info, including articles on boiling wood but it was shut down years ago. Last I heard (some years ago) Stephen was active in a woodturning club somewhere in Texas but I have no current info. I saved his almost his entire website from the Wayback Machine (internet archive) for my own use. I can't pass the HTML files of the articles to anyone but below are some excerpts from his boiling article (without the pictures) that may be useful. At the time he wrote this he said he had over 1500 bowls that were dried and ready for finish turning, stating again that the boiled bowls dried in about half the time as similar non-boiled bowls.
------------------------------------------------------------------------------------------------------------------------------------------------------------------------
Boiling Green Wood - Summary and Advantages
This testing clearly demonstrates that the addition of a boiling cycle helps to prevent or eliminate many common drying defects. For me, I plan to boil, and then bag much more often! I will reserve the plain paper bag method for pieces whose grain character and overall defects are within the demonstrated success profile. Other pieces that exhibit various defects or possible grain/growth ring compromises will get a "hot water bath."
I have also found that boiled timber dries an average of fifty percent faster than non-boiled timber. Another advantage comes when you sand the piece. Species that tend to clog the sandpaper when traditionally air-dried, offer little to no clogging when they are boiled. In addition, most unwanted guests are eliminated in the boil cycle. This is especially important if you dry your bowls inside your home and you want to stay out of divorce court!
It is clear that boiling green wood does have benefits for marginal, as well as sound pieces. It is my guess that the process relieves or relaxes much of the internal stresses. The area around the branchlets on dry (boiled) pieces was very tight and showed no separation from the surrounding timber. I believe that the combination of the heat and hot water loosens the lignin bond between the cell walls. The internal stresses then relax a bit when boiling green wood and when the piece cools, the lignin bond "cures" (for lack of a better word) in the new relaxed state. Wild grain and other defect prone areas are therefore, brought under control.
------------------------------------------------------------------------------------------------------------------------------------------------------------------------
Boiling Green Wood - The Procedure
An open pot is normally used for boiling green wood, but you can also use a pressure cooker. A pressure cooker will reduce the overall cooking time considerably. The problem is getting a large enough pressure cooker to hold your bowls! Whatever you decide to use, make sure you use a pot that you can dedicate to timber boiling. The extractives in the timber will quickly make a mess of your pot and you will not want to use it for anything else
In the past, I boiled my rough outs with a full rolling boil for the entire cycle. I found out that this was not necessary and just wasted propane. Those Cajun cookers can really burn the fuel! Now, I bring the pot up to a boil and place the bowls and platters into the “soup”. I boil most of the items for one full hour, per inch of wall thickness, under a low to medium heat (not a simmer, not a full rolling boil).
When boiling green wood, begin your one-hour timing (after placing the bowls into the pot) when your pot RETURNS to a boil! You must monitor the pot to insure it does not lose too much water. Periodically, you will have to replace some of the water lost during the boil. You can also cover the pot with a lid to help retain heat, water and conserve fuel. The hot water may slosh out and stain some surfaces, so take precautions to insure that you have suitable protection.
Some of the smaller items may require a weight to prevent floating. A brick, or a large rock works great for this. In unusual circumstances, I will continue boiling green wood for two hours if the piece warrants more time. However, all of the items in this particular test were boiled for approximately one hour. When I remove the pieces from the pot, I let them air-dry overnight to reduce some of the excess water and bag them the next day.
In extreme cases (like green Madrone Burr), put the items into cool water and then bring it up to a boil SLOWLY, over the course of two hours. When the water begins boiling (2 hours from the start), boil for two to three hours. When this cycle is up, (4-5 hours from the start) turn off the burner and let the piece sit in the pot until the next day. Then, remove the items from the water and air-dry them for one day before bagging. However, most timbers do not require this extra effort.
Sometimes, the design will limit the amount of pieces you can put in the cooking pot. For example, semi enclosed bowls, hollow forms or tall roughed out vases etc. However, I load as many pieces as I can fit in the pot. You can load quite a few platters into the pot, because they stack so well.
------------------------------------------------------------------------------------------------------------------------------------------------------------------------
Boiling Green Wood - Deciding When to Use the Protocol
Does the piece include branchlets in the sides/bottom? Is there wild grain on one side and straight grain on the other? Is the rim/bottom of the bowl near the smaller growth rings (closest to the pith)? Is the species well known for gross distortion or cellular collapse during drying? Does the species exhibit “honeycomb” degrade or severe corrugation when dried? If so, then I would suggest you augment your “plain paper bag” method (rough out placed in the bag without alteration of any kind) with a boiling cycle. Here's why...
------------------------------------------------------------------------------------------------------------------------------------------------------------------------
Boiling Green Wood - The Results
Of the four hundred and fifty bowls and platters included in the analysis, the largest amount of drying defects were in the plain paper bag test group. The least amount of drying defects were in the boiled, then bagged test group which had little to no drying defects (splits, fissures etc.) and exhibited significantly less gross distortion, warp, twist or other undulations in the test samples. Species with the largest amount of defects present when turned were Sycamore and Pecan, followed by Sweet Gum. For example: Several of the Sycamore and Pecan pieces had branchlets in the sides or bottoms of the test pieces.
Of the twenty bowls in the plain paper bag test group containing these branchlets, sixteen showed splits through the branchlets. Most of the splits were limited to the diameter of the branchlet in twelve bowls. The four remaining bowls had splits that extended well past the branchlet boundaries. All of the branchlets received an initial application of thin CA glue before going in the bag.
Twenty -one bowls and five platters in the boiled, then bagged test group revealed NO splits in any of the branchlets. Gross distortion on the rims of the bowls and platters was significantly less on the boiled pieces as well. They still warped a bit, but the overall rate was significantly less than the plain paper bag tests group.
Other comparisons demonstrated similar results. Twelve Black Ash bowls contained heartwood (wild grain) and sapwood in the same piece and were boiled, then bagged. These showed significantly less gross distortion than the plain paper bag test pieces. All of the Black Ash test pieces that were boiled, and then bagged had no splits. Of the ten pieces in the plain paper bag test group, two revealed minor splits.
Bowls turned with rims or tops very close to the pith also exhibited similar results. Of the forty- five bowls and twelve platters in the boiled, then bagged test group, only one bowl contained a split. Of the forty bowls and fifteen platters in the plain paper bag test group, thirty-one of the bowls and twelve of the platters exhibited numerous split defects at the rims.
------------------------------------------------------------------------------------------------------------------------------------------------------------------------
Boiling Green Wood - Summary and Advantages
This testing clearly demonstrates that the addition of a boiling cycle helps to prevent or eliminate many common drying defects. For me, I plan to boil, and then bag much more often! I will reserve the plain paper bag method for pieces whose grain character and overall defects are within the demonstrated success profile. Other pieces that exhibit various defects or possible grain/growth ring compromises will get a "hot water bath."
I have also found that boiled timber dries an average of fifty percent faster than non-boiled timber. Another advantage comes when you sand the piece. Species that tend to clog the sandpaper when traditionally air-dried, offer little to no clogging when they are boiled. In addition, most unwanted guests are eliminated in the boil cycle. This is especially important if you dry your bowls inside your home and you want to stay out of divorce court!
It is clear that boiling green wood does have benefits for marginal, as well as sound pieces. It is my guess that the process relieves or relaxes much of the internal stresses. The area around the branchlets on dry (boiled) pieces was very tight and showed no separation from the surrounding timber. I believe that the combination of the heat and hot water loosens the lignin bond between the cell walls. The internal stresses then relax a bit when boiling green wood and when the piece cools, the lignin bond "cures" (for lack of a better word) in the new relaxed state. Wild grain and other defect prone areas are therefore, brought under control.
Most of the platters in this test were crotch pieces and the feathers on the boiled pieces were tight and free of checks. By contrast, the plain paper bagged pieces did contain some minor checking in the crotch feather areas. Even very thin platters (3/8" thick) showed very little rim movement in the boiled samples. By contrast, the non-boiled group had some pieces that looked like a potato chip!
------------------------------------------------------------------------------------------------------------------------------------------------------------------------
There is more, but too much for me to include.
JKJ
