This is a response to some comments in a discussion post about thread chasing that morphed into threading jigs.
The comment I made was that if you owned a metal lathe you had the best machine for threading wood.
I started experimenting threading wood in 1990 and succeeded in making a 2 1/2" - 2 maple bench screw and nut plate and that was enough to get me started.
I will start with photos and explanations in installments of the current method I am using.
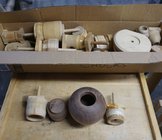
This photo shows a rough turned walnut urn and a blank for a lid along with male & female threaded chucks plus a box full of chucks in various sizes. The rough opening is about 2 1/8" diameter so I chose a set a nominal 2 1/2" - 10 (10TPI) (Metric terms 63.5MM X 2.54MM). The opening for the female thread was cleaned up to about 2.25" then it was taken from the wood lathe with the chuck to be mounted in the metal lathe.
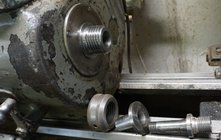
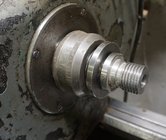
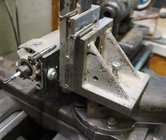
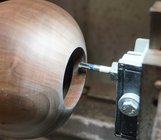
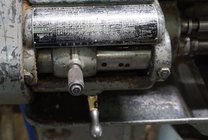
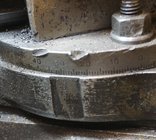
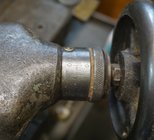
These 3 photos show the modifications necessary to the metal lathe. The first & second show how the 1 1/4 - 8 adapter is mounted to my LaBlond Regal lathe: The large threaded collar protects the spindle thread and is also used to remove the collet holder. The next piece is the 4C collet holder that fits into the headstock morse taper and adapts to the 4C collet. The third item is a 4C shank with the 1 1/4" - 8 adapter attached. Note the 4C collet system is no longer available, but it came with the lathe so I used it. The third photo shows the router mounted to the top slide with a 2 flute custom made carbide tipped 60 degree 1/4" shank bit.
I will try for the next installment tomorrow maybe.
The comment I made was that if you owned a metal lathe you had the best machine for threading wood.
I started experimenting threading wood in 1990 and succeeded in making a 2 1/2" - 2 maple bench screw and nut plate and that was enough to get me started.
I will start with photos and explanations in installments of the current method I am using.

This photo shows a rough turned walnut urn and a blank for a lid along with male & female threaded chucks plus a box full of chucks in various sizes. The rough opening is about 2 1/8" diameter so I chose a set a nominal 2 1/2" - 10 (10TPI) (Metric terms 63.5MM X 2.54MM). The opening for the female thread was cleaned up to about 2.25" then it was taken from the wood lathe with the chuck to be mounted in the metal lathe.


These 3 photos show the modifications necessary to the metal lathe. The first & second show how the 1 1/4 - 8 adapter is mounted to my LaBlond Regal lathe: The large threaded collar protects the spindle thread and is also used to remove the collet holder. The next piece is the 4C collet holder that fits into the headstock morse taper and adapts to the 4C collet. The third item is a 4C shank with the 1 1/4" - 8 adapter attached. Note the 4C collet system is no longer available, but it came with the lathe so I used it. The third photo shows the router mounted to the top slide with a 2 flute custom made carbide tipped 60 degree 1/4" shank bit.
I will try for the next installment tomorrow maybe.

