-
It's time to cast your vote in the December 2025 Turning Challenge. (click here for details) -
Congratulations to Pat White for "Sicilian Mosaic" being selected as Turning of the Week for December 29, 2025 (click here for details) -
Welcome new registering member. Your username must be your real First and Last name (for example: John Doe). "Screen names" and "handles" are not allowed and your registration will be deleted if you don't use your real name. Also, do not use all caps nor all lower case.
You are using an out of date browser. It may not display this or other websites correctly.
You should upgrade or use an alternative browser.
You should upgrade or use an alternative browser.
Can I beall buff this ?
- Thread starter Richard Patrick
- Start date
The buff is best used for film finishes
I never use a buff, especially on DO, just lightly sand with wet/dry paper or steel wool or 3M green with the DO still wet then wipe dry for about 3 applications with a couple days time between coats. When the DO no longer soaks in then wait several days and apply a quality wax that you could maybe buff with a clean buff or just hand rub with a clean cloth.
I never use a buff, especially on DO, just lightly sand with wet/dry paper or steel wool or 3M green with the DO still wet then wipe dry for about 3 applications with a couple days time between coats. When the DO no longer soaks in then wait several days and apply a quality wax that you could maybe buff with a clean buff or just hand rub with a clean cloth.
Finishing up a hollow form (seagrape) and just applied Danish oil. I would like to complete the finish with carnuba wax. Am I asking for trouble using the beall buff? Don't want to spend the rest of my life picking out fibers with tweezers !
I use “danish” oil a lot and have used the Beall buffing wheels on a few pieces.
A couple of points: - I find the oil works better the more coats I use since each one adds a bit to the film. The advice I got years ago was after sanding to at least 600 grit, use at least 6 coats of oil - after the initial coat is slathered on heavily, as much as the wood will take (some people even immerse (in a plastic bag for economy), wipe off and let dry overnight. The next day add another coat, wait at least 20 minutes, wipe off and let that dry overnight. Repeat at least 6 times. Then let it dry for a week or more before buffing.
I usually apply 8-10 coats over as many days, whether I’m going to buff or not. And I usually don’t buff since I usually prefer the soft sheen look rather than shiny. I’ve done this many, many times. But when I do buff, I use a light touch and usually a fairly low speed. However, the higher the speed, the “harder” the wheel gets and might reduce the likelihood of getting a bunch of fibers in the rougher areas. (I bought extra 2MT mandrels and mount each wheel on its own mandrel. I do not like the long rod with all three wheels since it limits access, especially for platters and such.)
For a glossy finish some people use lacquer or something else; I don’t. However, I have used TruOil gunstock finish to good effect, which can give a high shine and a durable finish without buffing. I’ve used it on small spindle work that sometimes had significant texturing - apply and rub it on the surface with a finger. (For gunstocks, the TruOil finish is usually followed by rubbing out with Pumice and Rottenstone padding for a durable, satiny, non-glossy finish. At least that is how I learned to do it.)
For no extra charge:
One thing about TruOil - it’s often sold in small containers, I theorize that’s for one main reason - once opened the stuff will set up to a useless gel VERY quickly! What I do to prevent this is before closing the cap, replace the air with either pure nitrogen or argon gas. As an example of how effective this is, II have one bottle of TruOil, half used, which is still good after sitting on my finish shelf for at least 8 years! (I have big cylinders of compressed gasses for welding, etc, so it’s handy. What also works is Bloxygen, but it is WAY expensive compared to the nitrogen or even the argon. Note: Bloxygen sold these days is simply argon in a pressurized can.)
Since I have tanks of argon and nitrogen, I also use it to replace the air of every container of finish I use, including “danish” oil. (You can make your own “danish” oil too, with no harm to any Danes!)
JKJ
What do you hope to improve with buffing? Personally I don't like rustic pieces of wood coated and shining like plastic.
I buff all my pieces. Give the danish oil time to cure before buffing. Wait about a week. The question might be how to buff with voids or natural edges. Make sure the buff is traveling away from the edges not toward the edges. That is important or the buffing wheel will grab the void and whip the piece across the shop. The other reason you implied is the buff leaving fuzz or threads in the voids. When the buff travels away from the edge it never touches the inside edge of the void and will not leave residue behind.
John, I thank you kindly for your advice, I have a lot of respect for your advice and experience. And I wouldn’t want to hurt any Danes in the process LOLYou can make your own “danish” oil too, with no harm to any Danes!)
Lyle, thanks for chiming in here. To have advice from pros like you and others here is really appreciated. I’ll be sure to post in the gallery when completeI buff all my pieces. Give the danish oil time to cure before buffing. Wait about a week. The question might be how to buff with voids or natural edges. Make sure the buff is traveling away from the edges not toward the edges. That is important or the buffing wheel will grab the void and whip the piece across the shop. The other reason you implied is the buff leaving fuzz or threads in the voids. When the buff travels away from the edge it never touches the inside edge of the void and will not leave residue behind.
Lyle - I think we’re thinking about this the same way, but when I buff natural edge pieces with the bark on I’m very careful that the bowl is held so that the buff hits the solid wood and travels ‘towards’ the natural edge but runs off of the piece before it gets to the bark. I don’t want the buff hitting the wood anywhere near the bark for the concern you mention of grabbing.…Make sure the buff is traveling away from the edges not toward the edges….
Richard - if I really wanted to buff your piece I think it could be done with a light touch and careful placement but I’d be VERY careful to not let the buff get near any of the cracks for the concern with fuzz you mention AND even more concern about grabbing it out of my hands.
I suspect a Stop-Loss bag would work well also.What I do to prevent this is before closing the cap, replace the air with either pure nitrogen or argon gas.
Odie
Panning for Montana gold, with Betsy, the mule!
@John K Jordan
You should consider having an AAW album here on the forums.
Most everyone participating here would like to see the results of those who give advice.....makes that advice much more meaningful.
Thanks
-o-
You should consider having an AAW album here on the forums.
Most everyone participating here would like to see the results of those who give advice.....makes that advice much more meaningful.
Thanks
-o-
Thanks for the advice Odie…. I don’t know how that works but I’ll take a stab at it! By the way, really enjoy seeing your work here, pretty awesome stuffYou should consider having an AAW album here on the forums.
Most everyone participating here would like to see the results of those who give advice.....makes that advice much more meaningful
Well that was easy ( I think it worked). Odie, thanks for the motivation!You should consider having an AAW album here on the forums.
Most everyone participating here would like to see the results of those who give advice.....makes that advice much more meaningful
How does one make an album? Is there a FAQ or something that describes the limits, such as file size, pixel limits, number of photos permitted, etc?
- Joined
- Feb 28, 2021
- Messages
- 1,778
- Likes
- 1,592
- Location
- Roulette, PA
- Website
- www.reallyruralwoodworks.com
Umm I believe if you scroll all the way back up to the top and look along the very top edge of this page, you may see "Photo Gallery" link and I believe that is where Odie refers to setting up an album.. and as for how-to - there's a post here: https://www.aawforum.org/community/threads/how-to-post-images-in-the-gallery.12909/ from Bill BoehmeHow does one make an album? Is there a FAQ or something that describes the limits, such as file size, pixel limits, number of photos permitted, etc?
Thanks, I take a look. An album might be a good idea.Umm I believe if you scroll all the way back up to the top and look along the very top edge of this page, you may see "Photo Gallery" link and I believe that is where Odie refers to setting up an album.. and as for how-to - there's a post here: https://www.aawforum.org/community/threads/how-to-post-images-in-the-gallery.12909/ from Bill Boehme
Someone mentioned the dreaded "plastic" look. When talking with Sir Lucas once we both had made the same observation: If black ebony is turned, made smooth, and polished it looks just like black plastic! I keep an eye out for ebony with enough brown streaks in it to look like wood. Also, I don't remember if I mentioned, but I rarely buff something to a gloss. For most things I prefer a soft, satin surface, shinier than matte but not glossy. Sometimes dressing down a shiny finish with 0000 steel wool or very fine sandpaper looks great.
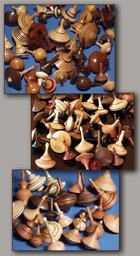
The finishes on most of these look good to my eye:

JKJ
The finishes on most of these look good to my eye:

JKJ
You should consider having an AAW album here on the forums.
Most everyone participating here would like to see the results of those who give advice.....makes that advice much more meaningful.
How does one make an album? Is there a FAQ or something that describes the limits, such as file size, pixel limits, number of photos permitted, etc?
I read BillB's the how-to and the rules for posting to the "gallery" but not about an "album". What is the practical difference? The how-to hinted that another tutorial on uploading to albums was coming, but that was in 2017.
The rules state "The image gallery is strictly for displaying your completed turnings." But when browsing, some old photos I did see a few photos with tools instead of completed turnings. Perhaps they were "grandfathered" from long ago?
I'm interested in organizing my photos by categories if possible.
Something I read implied an album might be better (perhaps the only way?) for organizing into categories. I tried selecting a few members by name and that seemed to work, but their photos weren't organized into any categories. For that, do photos need to have been specifically uploaded to an album?
Sorry for all the questions. I'm elderly and feeble-minded.
JKJ
Dave Landers
Beta Tester
@John K Jordan - When you add something to the Photo Gallery, you get the choice of Member Galleries or a personal album. The difference is mainly organization. The Member Galleries is essentially like "other" or "default" or "no album". Everything shows up on the gallery page's new or recent photos regardless of its album. You can also "tag" your photos with keywords if you want. So it's all just organization choices. Like others (I assume), I am not using this site to organize my work, but just to show it, so I use the member gallery and haven't been tagging.
When you add something to the Photo Gallery, you get the choice of Member Galleries or a personal album. The difference is mainly organization. The Member Galleries is essentially like "other" or "default" or "no album". Everything shows up on the gallery
Thanks for your great explanation. I’ll give it a try when I get a break. It would be fun to put some pictures in an album here. (BTW, when I do a demo in a new place I usually like to show a very quick slide show give those who don’t know me a taste of the kinds of things I like to make. An album here might serve a similar purpose.)
As for photos, I do the organization on my computers, with a big NAS for redundant backup and centralized raid storage on my network and local SSD daily backups on each machine. I organize by directory, sub directory, and by file name so I can usually locate a photo in a few seconds. I have a lot of woodturning photos but not all are unique - some are all the original unedited hi-res photos, some are composites and the associated photoshop files (with edits and layers).
The directory tree I access the most is what I named “For posting”: images I’ve edited, cropped, resized and compressed to make them more friendly for website data limits, email, and to respect those with limited internet bandwidth! (hard to believe but I heard a rumor that some people don’t have gigabit broadband connections -
Out of about 75,000 photos on my disks, over 3000 are in the special woodturning section of those edited and with reduced file size. Don't worry, I won't try to post all of them in an album here!! Some are finished pieces, some are tools, some techniques, some are students working.
One might guess that I love taking photos! If anyone is interested in a simple way for woodturnings, out of many methods, this works me for shooting small to medium-sized things in my shop: a "photo cube" made with PVC pipe, thin white cloth held on with safety pins, a curved piece of grey mat board for a seamless background, and several adjustable lights to control highlights and shadows. Real cheap and easy to make. (I take it down to use the table saw!)

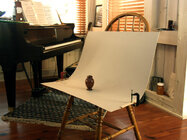
A simpler method with less light control uses only the curved background clamped to a chair:


JKJ

