• January Turning Challenge: Thin-Stemmed Something! (click here for details)
  • Conversations are now Direct Messages (click here for details)
  • Congratulations to Scott Gordon for "Orb Ligneus" being selected as Turning of the Week for January 20, 2025 (click here for details)
  • Welcome new registering member. Your username must be your real First and Last name (for example: John Doe). "Screen names" and "handles" are not allowed and your registration will be deleted if you don't use your real name. Also, do not use all caps nor all lower case.

bead turning help

Joined
Jun 28, 2015
Messages
14
Likes
0
Location
Manchester, CT
Does anyone know of a good closeup video of turning decorative beads on the outer rim of a bowl and on the base of a bowl or platter.
I find that after all the work it takes me to make a nice bowl I'm afraid of turning a decorative bead because the few times I have tried it I get a dreaded spiral catch. I don't care for bead turning tools as they always seem to leave some tearout -- as expected in that they are essentially scraping tools. I know my problem is tool presentation and I would love to see a close up video. I have seen a Richard Raffin video in which he quickly makes a bead on the side of a bowl and comments that people tend to add too many beads once they see how easy it is--- but he doesn't really show how to do it. Suggestions would be much appreciated.
 
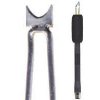
Here is what you need: D-Way Beading Tools. I have several of his beading tools that I use for turning basket illusion pieces which require very precise and clean beads. He also sells handles, but I have found that I don't really need a handle for the tools.

Dave Schwertzer's beading tools are unlike any other beading tool that you have seen before. You need to also watch his videos to see how they are used because they are used flute down in what appears to be a very unconventional manner. Also if you want to make very large beads, you can get his teardrop beading tool, AKA diamond beading tool. It is also used in an unconventional manner to make free-form beads.
 
I turn beads on bowls with a spindle gouge. They need much less sanding than the ones cut with scrapers made from gouges.

The trick is to keep the point of the gouge out of the wood and the handle low.
I use a 3/8" or 1/2" with a 30 degree bevel and a fingernail grind.
I turn them with the bowl on a jamb chuck opening facing the the headstock last part of returning the outside.
Tool handle low, bevel on the wood not cutting tool tip pointing up. Roll the tool and pull the handle up or out a bit to engage the cut on the wing.
I cut my beads going both ways to make each groove. I get close to the tip at the bottom of the groove.

Al Stirt does a great demo and uses a detail gouge with something close to a 69 degree bevel.
Handle low with the wing contacting the wood. Tip out of the wood. Al does all of the grooves with the left wing.
The gouge allows beads if just about any size. I like to do 2'or 3'together in different sizes.

You can also make a scraper from an old gouge. A too short gouge is long enough to serve as a beading tool.
Just going it on the tip until you have two sharp point and a curve.
These beading tool make one size bead and the grooves are a bit wider than those made with a spindle gouge


Have fun

Al
 
Last edited:
Check out this article...

I don't care for bead turning tools as they always seem to leave some tearout -- as expected in that they are essentially scraping tools.

I visited Dave Schweitzer last week in his shop, and I'll second the suggestion to get one of his beading tools and suggest you read this article<click> by Larry Randolf before you say "no" [the meat comes at the bottom of the first column]. Assuming you're not turning a soft wood, they don't tear out unless you go too deep. They make a beautiful bead. TIP: Dave's specific and emphasized point of instruction is to not go past the point where the flat at the top of the beading area disappears -- then stop!
 
Last edited:
I visited Dave Schweitzer last week in his shop, and I'll second the suggestion to get one of his beading tools and suggest you read this article<click> by Larry Randolf before you say "no" [the meat comes at the bottom of the first column]. Assuming you're not turning a soft wood, they don't tear out unless you go too deep. They make a beautiful bead. TIP: Dave's specific and emphasized point of instruction is to not go past the point where the flat at the top of the beading area disappears -- then stop!

Lucky you being close enough to just drop in on Dave. It would be about a three day drive for me. Another tip on beading face grain turnings is to mist the wood with water. That seems to help some tearout prone wood.
 
Thank you all for the responses. I will give D Way a try. I would still like to be proficient turning a bead with a tool that does not restrict my bead dimension but have the feel that I'm close to the danger zone using a spine gouge on a platter or face turning. Low handle and trying to stay off the point of the gouge is not in my comfort zone at this point.
 
As part of a larger demo on the basket illusion pieces that he creates, Harvey Meyer demonstrates how he beads on face-turned pieces using the D-Way beading tools in this video:

https://www.youtube.com/watch?v=5A4UI_7OYDo

Fast forward to about 19:00.

I've discussed basket illusion turnings and woodburning with Harvey on the World of Wood forum. Our preferred (actually, the only) manufacturer of pens for burning the beads, Detail Master, went out of business earlier this year because the owner had serious health problems. I was able to get a 1/8" pen through Jim Adkins and found a 1/4" pen online ... and then the well went dry. Another manufacturer of pyrography pens tried making a bead burning pen, but I could tell right away that it was not going to be satisfactory and, I believe that it may have been Harvey who bought one and confirmed my prediction. Fortunately, Harvey was able to talk Optima into making this type of pen for burning the beads and it turned out to be a rousing success ... I would go so far as to say that the tips are even better than the Detail Master tips. However, nobody makes a pen body that even comes close to working as well as the Detail Master vented pen bodies.

BTW, I agree with Harvey Meyer that Jim Adkins is the best there has ever been at creating basket illusion turnings.
 
I've discussed basket illusion turnings and woodburning with Harvey on the World of Wood forum. Our preferred (actually, the only) manufacturer of pens for burning the beads, Detail Master, went out of business earlier this year because the owner had serious health problems. I was able to get a 1/8" pen through Jim Adkins and found a 1/4" pen online ... and then the well went dry. Another manufacturer of pyrography pens tried making a bead burning pen, but I could tell right away that it was not going to be satisfactory and, I believe that it may have been Harvey who bought one and confirmed my prediction. Fortunately, Harvey was able to talk Optima into making this type of pen for burning the beads and it turned out to be a rousing success ... I would go so far as to say that the tips are even better than the Detail Master tips. However, nobody makes a pen body that even comes close to working as well as the Detail Master vented pen bodies.

I assume the other manufacturer you are referring to is Razertip? I too tried to get a Detail Master while they were still around and was never able to. I have one of their other pens and agree about the quality of the bodies. They are simply outstanding and its a shame they are no more. I have the Razertip pen and was dissatisfied with it at first but then I followed advice Harvey had posted somewhere else and honed down the tips a bit and now it works pretty well, IMHO. The problem with it is that the arch on it is too peaked/too tall for the bead left by the D-Way tool. Shortening its height solves the problem. I have not tried the Optima as it did not exist when I bought my stuff. I may pick one up just to compare with my modified Razertip.

BTW, I agree with Harvey Meyer that Jim Adkins is the best there has ever been at creating basket illusion turnings.

That depends on what you mean. In terms of creating pieces that are actual basket illusions, yes, I cannot disagree. In terms of using the technique to create beautiful pieces, my vote goes strongly to the late David Nittmann.
 
As the various posters explain, there are multiple ways to get good results. I believe the key is not wait until you finish that nice bowl before you start practicing. Get a bowl blank, and work on it. Make a bunch of beads, turn them off and do it again. Most of the cuts we take are not that hard but it does take working a bit on your tool control. This can be a fun exercise. Don't feel like you have to always produce a final product when you start turning. Sometimes the final product is a bunch of shavings and a new found knowledge or skill. My 2 cents.
 
I assume the other manufacturer you are referring to is Razertip? I too tried to get a Detail Master while they were still around and was never able to. I have one of their other pens and agree about the quality of the bodies. They are simply outstanding and its a shame they are no more. I have the Razertip pen and was dissatisfied with it at first but then I followed advice Harvey had posted somewhere else and honed down the tips a bit and now it works pretty well, IMHO. The problem with it is that the arch on it is too peaked/too tall for the bead left by the D-Way tool. Shortening its height solves the problem. I have not tried the Optima as it did not exist when I bought my stuff. I may pick one up just to compare with my modified Razertip....

I couldn't remember the brand, but I verified that it is Razertip. Here is a picture of one of the beading tips they make.

F98-030.jpg

The problem is that most of the heat is wasted in the nichrome wire and very little where it needs to be. This means that your fingers are likely to get uncomfortably hot during a long period of use. Also the construction puts most of the heat at the top of the bead.

Here is picture of the Optima bead making tip which is very similar to the Detail Master tip.

ph21a.jpg

Because the nichrome is thinnest at the beading tip, that is where most of the heat will be produced. I have use both the Optima bead making pen and the Detail Master pen for extended periods with out my fingers getting hot. However, the Detail Master pen feels much more comfortable to hold since it isn't much larger than a writing pen.

... That depends on what you mean. In terms of creating pieces that are actual basket illusions, yes, I cannot disagree. In terms of using the technique to create beautiful pieces, my vote goes strongly to the late David Nittmann.

I agree with you on both counts. David's work was a departure into new territory, so any comparison needs to be qualified.

As the various posters explain, there are multiple ways to get good results. I believe the key is not wait until you finish that nice bowl before you start practicing. Get a bowl blank, and work on it. Make a bunch of beads, turn them off and do it again. Most of the cuts we take are not that hard but it does take working a bit on your tool control. This can be a fun exercise. Don't feel like you have to always produce a final product when you start turning. Sometimes the final product is a bunch of shavings and a new found knowledge or skill. My 2 cents.

That is true for many types of surface embellishments. I also have done the same thing on my way to the final beading to get a feel for how the wood is going to "behave" and make adjustments if I see a problem. I do the same when making a dyed turning where I make some "trial runs" with different ideas to see how the dye and wood figure are going to play together.
 
I couldn't remember the brand, but I verified that it is Razertip. Here is a picture of one of the beading tips they make.

View attachment 9035

The problem is that most of the heat is wasted in the nichrome wire and very little where it needs to be. This means that your fingers are likely to get uncomfortably hot during a long period of use. Also the construction puts most of the heat at the top of the bead.

Yup. You can see the shape problem with the Razertip compared with the Optima just from the two pictures you posted. Filing the points down a bit definitely resulted in a more consistent, even burn across the bead. I'm pretty sure the Optima would still be better though.

One of Harvey's suggested modifications to the Razertip was to angle the tip, which also helped with "hot hand".
 
Wells that's why I recommend raising the tool rest as you can see in the last part of my video. Turning beads on a platter becomes much easier with a very high tool rest position. It lets you turn the bead in a similar fashion to how you turn them on a spindle. If you actually stay off the nose which I'm not sure I mentioned in that video then it becomes much safer. Start the cut on the left side of the bead using the area just left of the tip and then as you rotate the tool let the cut come down the spindle gouge. Just the opposite with the right hand side. I am assuming you have ground the spindle gouge with somewhat of a wing like a bowl gouge. I guess I should have stated that up front. You can turn a bead using the left and right hand side of a normal spindle gouge grind you have ground them to a rounded fingernail grind.
 
How ironic--this thread came up at exactly the time I started working on a lidded bowl with 3 beads. I've put beaded detail on bowls before, using a spindle gouge, but not for a while. It was humbling just trying to remember how to do it, much less getting a decent bead without ruining the underlying piece. This has been a good reminder to do some practice from time to time as my skills can be transient. When recently showing the new crop of high school turners how to make beads on a spindle, I found the hard earned ability to make the same shape on each side of the bead had disappeared in the past year. It all makes for more opportunity to turn, but why does it have to rear up when I'm falling behind on Christmas presents?
 
I highly recommend practice. It's by far the best way to really get the feel for how a tool works. In doing this practice I also turned a bowl with nothing but beads for the outside. I screwed a few up of course so I turned them into coves. The club really liked it. It wasn't until someone commented on how nice the random placement of the coves was that I told them the truth.
Here's a good practice for learning to turn beads. Yea I now it's with a skew but the cutting action is the same the practice project is wonderful for learning to turn beads with whatever tool.
https://www.youtube.com/watch?v=vA91yJ9KhKU
 
I will jump on the practice bandwagon too. Regardless of what tool you use.

The spindle gouge will make nice beads on wet wood.
The beading tool made from a gouge makes nice beads on some wet wood usually with more tear out ,than on dry wood but will be ok.
I have to get a surface on the beads I can sand at 220 to keep the shape. If I sand with 150, I deform the beads.

Cut a bowl blank about 11" diameter 5" high with the rim facing the bark from green wood centered in the grain.
Turn the outside between centers, then turn beads from the foot to the rim.
If i have a plan I put pencil lines where the grooves go.
I often leave an inch at the top without beads.
If you don't like the beads. Make a smaller bowl

Finish the tenon.
Turn out the inside making it about. 1/4" thick to the grooves between of the beads. Be sure to round the rim.
This bowl will warp into pleasing slightly oval shape that is pleasing to look at and pleasing to hold.
A soft rolled edge looks better to me than a sharp edge when it warps.
You might get away with not sanding the outside and it will still feel good.
If you turn these bowls with the rim to the center of the tree it warps with two peaks in the rim which I find less pleasing to the eye.

Turn a couple of those and you will be ready to tackle the bowl you have significant time invested in.

Planning beads: I usually avoid having beads pass through areas of the wood that has defects like knots or worm holes.


Al
 
Thank you all for the responses. I will give D Way a try. I would still like to be proficient turning a bead with a tool that does not restrict my bead dimension but have the feel that I'm close to the danger zone using a spine gouge on a platter or face turning. Low handle and trying to stay off the point of the gouge is not in my comfort zone at this point.

Give Dave a call, he's usually pretty available. You might ask him about his tear-drop tool also. I'm not finding it on his new website, so not sure he still sells them.
 
... I'm not finding it on his new website, so not sure he still sells them.

I saw it there yesterday ... look for diamond beading tool instead of teardrop tool. Here is a link

I have no idea why he prefers to call it a diamond tool when it looks like a teardrop tool.
 
Well now the Diamond tool looks interesting. From the picture I assume it must be for some part of beading. Anyone know of a video showing it's use.
the reason I prefer to turn my beads instead of using a beading tools is that I like to change the size. I think they look better going from big to small especially if you do the entire outside of a bowl or a longer tapered wine stopper.

There are several videos on the site that show how to use the beading tools including the diamond tool. You can also call Dave and talk to him about using the tool. They are very easy to use and cut very cleanly. After watching his videos I was able to use the tool with no learning curve necessary ... it's that easy in my opinion.
 
Love my D-Ways

I use the beading tools, as well as the 'teardrop'. Generally, I'll use the beaders to mark the bead, then form it w/ a detail gouge, and final shape w/ a beading tool. Sometimes, this will leave a bit of torn grain on the very peak of the bead. If so, I'll VERY lightly re-touch w/ the gouge, and then a final LIGHT touch w/ the beader. I use the teardrop after forming all beads, to finish the v cuts between beads. Works as Dave says, easily finishes bottom and sides 'evenly' w/ no worries of catches. A nice compliment to using a skew often times, imho...
 
I learned a long time ago to "tuck in" a bead by using the toe of the skew to make that clean cut inbetween the beads. Exactly like making a V cut. On a good day when I turn beads with the skew I don't have to do that since turning the left and right sides of the beads all the way to the bottom with the skew does it already. However a lot of days especially when I haven't been turning beads in a while I get too nervous to cut all the way to the bottom so I'll stop, flip the skew over and use the toe to tuck in the bead. Of course this is only necessary if you have 2 or more beads right beside each other.
 
Well now the Diamond tool looks interesting. From the picture I assume it must be for some part of beading. Anyone know of a video showing it's use.
the reason I prefer to turn my beads instead of using a beading tools is that I like to change the size. I think they look better going from big to small especially if you do the entire outside of a bowl or a longer tapered wine stopper.

It's incorporated in his Beading Tools videos: There's a little when he introduces it in Video #1<click> -- He brings it in at 9:00, keep going until you get to 11:26, he shows a piece with spiraling beads that change size. Then, in Video #2<click>, he starts out using the teardrop tool.
 
Last edited:
Wonderful advice from all. Thank you.
I need to curtail some of my desire to create something and spend some more time with dedicated practice.
John, Your videos are very helpful.
Wells
 
Back
Top