• Beware of Counterfeit Woodturning Tools (click here for details)
  • Johnathan Silwones is starting a new AAW chapter, Southern Alleghenies Woodturners, in Johnstown, PA. (click here for details)
  • Congratulations to Paul May for "Checkerboard (ver 3.0)" being selected as Turning of the Week for March 25, 2024 (click here for details)
  • Welcome new registering member. Your username must be your real First and Last name (for example: John Doe). "Screen names" and "handles" are not allowed and your registration will be deleted if you don't use your real name. Also, do not use all caps nor all lower case.

Need Design Help

Randy Anderson

Beta Tester
Beta Tester
Joined
May 25, 2019
Messages
835
Likes
1,228
Location
Eads, TN
Website
www.etsy.com
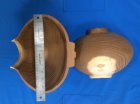
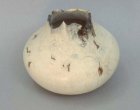
I'm not very artistic. I can make a very nice natural edge bowl and classic standard shape traditional bowl. I can put a rim on the top but often just make big or small salad, soup or decorative traditional style bowls. Nothing fancy. Got that down but, I'm envious of all the detail designs and styles I see here all the time and would like to up my game. I have this chunk of bradford pear I picked up from a neighbors yard and decided to try something unique. You can see the before (raw log) pic and a few of the blank I have mounted now after I cleaned it up just a bit. It's the splice part area of a bradford pear so there are limbs and joints all through it. I can't help but think there's something in there worth trying for. It might end up on the burn pile but worth a try. 6 1/2" from top to bottom of tenon and 10" across at top. It will definitely have inclusion gaps, knot holes and branch grains running all directions. Ideas on what to do with it? Shape to a big hollow form rough size, seal and let dry? Go ahead and turn to a steep sided bowl with some design work on the sides? Leave the bark areas on the sides in a few places? Throw it away and forget I saw it? Just looking for something different. Low risk here. Not a prized piece of wood. I cleaned up my tenon, wrapped it in plastic and set it aside so have some time to decide. Thx.
 

Attachments

  • IMG_3757.JPG
    IMG_3757.JPG
    58.9 KB · Views: 62
  • IMG_3756.JPG
    IMG_3756.JPG
    63.1 KB · Views: 62
  • IMG_3755.JPG
    IMG_3755.JPG
    62.2 KB · Views: 61
  • IMG_3753.JPG
    IMG_3753.JPG
    71.6 KB · Views: 60
Last edited:

hockenbery

Forum MVP
Beta Tester
TOTW Team
Joined
Apr 27, 2004
Messages
8,593
Likes
4,890
Location
Lakeland, Florida
Website
www.hockenberywoodturning.com
If there is a nice place to form an opening on the headstock side, I would turn a hollowform to finish thickness with wall 3/16” let it dry and warp then sand. I would mount it on a 3” faceplate.

this is the shape I would go for it scales to any size 56098489-9026-4B6E-985C-4D3DC6E29B12.jpeg

Two more similar shapes
this one Has a natural rim 35F6D7BF-25F8-46BF-A3AA-F97A73252113.jpeg Is a little taller proportionally


This one is a little flatter proportionally E1BE29FB-E08B-4F9E-9E59-9922AE1FED26.jpeg You probably don’t need the beads or sandblasting with the grain that you will have.


If you haven’t used a faceplate a lot, take a look at this thread it links to a video of me mounting a hollow form on a 3” faceplate, need 4” of wood
https://www.aawforum.org/community/index.php?threads/mounting-a-faceplate.14749/

Also Lyle jamieson has a nice video on mounting a faceplate. We use similar technique the import common element is a slight concave so that the edge of the faceplate makes solid contact with the wood.
 

Randy Anderson

Beta Tester
Beta Tester
Joined
May 25, 2019
Messages
835
Likes
1,228
Location
Eads, TN
Website
www.etsy.com
Thanks and I think that's probably a good idea. I've only just started doing hollow forms so anxious to try more. The ones I did were small already dried and gnarly pieces but came out just fine, at least to me. Didn't know you could or should do a green wood hollow form. Have faceplates and have used them although not very often. Will take a look at your link for a refresher. You would have the opening on the head stock end in the pic?
 

hockenbery

Forum MVP
Beta Tester
TOTW Team
Joined
Apr 27, 2004
Messages
8,593
Likes
4,890
Location
Lakeland, Florida
Website
www.hockenberywoodturning.com
Thanks and I think that's probably a good idea. I've only just started doing hollow forms so anxious to try more. The ones I did were small already dried and gnarly pieces but came out just fine, at least to me. Didn't know you could or should do a green wood hollow form. Have faceplates and have used them although not very often. Will take a look at your link for a refresher. You would have the opening on the head stock end in the pic?

I turn all of my hollow forms to finish thickness mostly from green wood. They do warp but that is part of the appeal
Most of my hollow forms are hollowed through the face grain and many have a natural edge openings.

My general method of doing a hollow form is to decide where the opening will be, drill a 1.25 hole drive the spur drive i in then rough shape the form and turn the faceplate mount at the tailstock end. I still have the option of flipping the form is something in the wood shows up that I want to feature or avoid.

you can have the opening at either end because you are working between centers and can easily flip the form.

Fist decision - which parts are solid enough to hold the faceplate?
for example - I can make an opening in a bunch of bark inclusions and often get a great looking rim , bark inclusions won’t hold a faceplate.
If both sides are solid I pick the opening to be where the most attractive wood grain will be when I sought face off bathe sides and take a look.
 
Joined
Mar 17, 2006
Messages
214
Likes
96
Location
Canton, Connecticut
Randy - with respect to green wood HFs, you can do them one of two ways. Turn it to a finished wall thickness, and let it dry slowly to try and prevent cracking. The form will distort as it dries, and that will become part of the artistic appeal. The other way is to turn the HF and leave a "thick" wall (1/2" - 5/8" is what do), coat it with anchorseal on the outside, and hang it up to dry. It will take 3 - 4 months, depending on the humidity level in your shop. Weight it after the first turning, and record the weight. Then weight it every few weeks and continue to record those weights; the weight will drop as it dries. Once the weight no longer drops, the moisture content is stable with your shop environment. It's then ready for the second turning to get it back into round. Inclusions/openings in the wall of the HF are also part of the artistic presentation.

Concerning the face plate, don't forget to leave enough wood on the bottom so the holes from the screws can be turned off. Hope that helps.
 
Joined
Dec 23, 2014
Messages
178
Likes
289
Location
Sebastopol, California
All good advice. With all due respect, I'd be wary about returning that piece. It looks so gnarly, you don't know what you're gonna reveal inside. If you rough turn that, it could well distort to the point that it's seriously hazardous to remount/return. Think, flying chunks of wood coming apart. I'd go for it all now - turn to shape, then wrap the bastard with tape to help stabilize the outside while I hollowed out the inside (whether it's a closed or open form, either way). It'll be fun to see what you end up with.
 
Joined
Aug 14, 2007
Messages
5,436
Likes
2,792
Location
Eugene, OR
I like the general shape of that piece. I would try to turn it to 1/4 inch thick max walls, and let it dry and warp, though I prefer the warped shapes. The outside surface of that one will be very 3 dimensional when done moving. For me, I would try to at least wet sand to 220 before letting it dry, and then when dry, in about a week, I would apply more finish and buff with one of the grey synthetic wool pads on my angle drill. I would probably wrap the entire outside with the stretch film as well. If you let it dry and then sand, you will lose a lot of that 3 D surface, which I prefer. Some prefer the smooth finish though.

robo hippy
 

Randy Anderson

Beta Tester
Beta Tester
Joined
May 25, 2019
Messages
835
Likes
1,228
Location
Eads, TN
Website
www.etsy.com
As always the wood gets a vote in the outcome. Had a nasty bark inclusion in one end that I had to deal with so lost over 2" and decided to go for a good sized bowl (9" x 4") instead and even that was a challenge to retain enough for a tenon and foot. Didn't think I had enough for the hollow form idea. Ended up nice with some beauty marks that will fit it well. My first shot at the Robo method of turning a green traditional to final, plastic wrap and wait and see. It's in the LDD tub until tomorrow. Didn't make it quite to 1/4" but close and did make sure consistent all over and in bottom.
 

Randy Anderson

Beta Tester
Beta Tester
Joined
May 25, 2019
Messages
835
Likes
1,228
Location
Eads, TN
Website
www.etsy.com
Update - it dried different than anything I've seen. Fair amount of cracking but still round. It held to 8 3/4" across rim all around. Guess with no distinct grain direction it balanced out. Outside a bit wavy and rim has some undulations but they fit the overall very rustic handmade look and feel I think. I like it and don't want to give up on it. I've sanded to 320 and it looks good wet so I'm inclined to proceed with next step. Either sand a bit more and put some oil on it or try a colored epoxy fill. I've used 5 min epoxy quite a bit to fill knot holes and small cracks but never done anything with colored epoxy or to the level this would require. I have some black dye for my 5 min stuff but haven't used it yet plus black doesn't seem like the right color if I do.
 

Attachments

  • IMG_3798.JPG
    IMG_3798.JPG
    48.7 KB · Views: 32
  • IMG_3797.JPG
    IMG_3797.JPG
    52.1 KB · Views: 31
  • IMG_3795.JPG
    IMG_3795.JPG
    53.1 KB · Views: 31
  • IMG_3796.JPG
    IMG_3796.JPG
    47.3 KB · Views: 31
Joined
May 4, 2010
Messages
2,432
Likes
1,850
Location
Bozeman, MT
Randy, you've got at least 8 knots in that bowl. Some of them may not crack but many/most will, and they'll probably pooch out a little as well. As you describe yourself, I'm not very artisitic, but to me, maybe the answer is to leave the cracks alone. This is not going to be a soup bowl. It's decorative/artistic rather than functional, so maybe it ought to be 100% itself and natural.
 

Randy Anderson

Beta Tester
Beta Tester
Joined
May 25, 2019
Messages
835
Likes
1,228
Location
Eads, TN
Website
www.etsy.com
Dean, it's dry and stable so not sure it will move more. Had it out in open air for a while now so went ahead and sanded. When I said looks good wet I meant when I put water or mineral spirits on it to check my sanding. My neighbor, who is more artistic than I am, agrees with you - leave as is and don't eat chili out of it.
 
Back
Top