• Beware of Counterfeit Woodturning Tools (click here for details)
  • Johnathan Silwones is starting a new AAW chapter, Southern Alleghenies Woodturners, in Johnstown, PA. (click here for details)
  • Congratulations to Keven Jesequel for "Big Leaf Maple" being selected as Turning of the Week for April 15, 2024 (click here for details)
  • Welcome new registering member. Your username must be your real First and Last name (for example: John Doe). "Screen names" and "handles" are not allowed and your registration will be deleted if you don't use your real name. Also, do not use all caps nor all lower case.

Machine cut wood threads

Joined
Jul 19, 2018
Messages
1,710
Likes
2,240
Location
Ponsford, MN
The first threading that I did was in 1991 due to a request to make a bench vice screw and nut in 2 1/2 - 2. The method I developed involved a router mounted to a carriage on on the lathe ways, connected to the head stock spindle via a 4 pitch acme screw and a 2 to 1 sprocket connection. The next method was to build an off lathe machine with change gears (timing belt and timing pulleys) for multiple pitches between the spindle and lead screw, the I took with me to the 1993 symposium in Provo Utah. The third and current method is a vintage LeBlond engine lathe with a 1 1/4 - 8 adapter and a trim router mounted to the cross slide. The photos illustrate cutting threads on the lid for an urn similar to my avatar. I do not use inserts of different woods but rather if necessary will harden the wood with CA.

photo 1 - On the wood lathe prepped for the male thread on the lid.
photo 2 - cutting threads on the Leblond.
photo 3 - Using threaded lid to finish the base of the urn.
photo 4 - Holding the lid on a female threaded block similar to a jam chuck to do further work on the lid.
photo 5 - Starting the lid finial.
photo 6 - finished Urn and lid.
photo 7 - small mesquite keepsake urn.
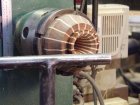
101_1338.JPG 101_1340.JPG 101_1341.JPG 101_1343.JPG 101_1345.JPG 101_1346.JPG 9123Kurna.JPG
 
Last edited:
Joined
Jul 26, 2016
Messages
2,326
Likes
1,105
Location
Nebraska
With that setup you can cut just about any thread you want with the change gears.or quick change gear box.
 
Joined
Apr 30, 2020
Messages
293
Likes
202
Location
Quad Cities, IL
My thoughts exactly. My Jet GHB1340 has the quick change gear box. I've cut hundreds if not thousands of threads on it.
I hadn't really thought about using it for wood.
 
Joined
Jul 19, 2018
Messages
1,710
Likes
2,240
Location
Ponsford, MN
My thoughts exactly. My Jet GHB1340 has the quick change gear box. I've cut hundreds if not thousands of threads on it.
I hadn't really thought about using it for wood.
The quick change on my LeBlond goes from 4 up to ? the high 2 digits, but due to the seasonal moisture changes in wood I usually stay in the range of 8 to 13.
The LeBlond came with a set of 4C colletts that included 2 dead 60 degree centers, so I pressed a larger piece of steel onto one and turned it to approximate a 1 1/4-8 spindle.
 
Joined
Jul 26, 2016
Messages
2,326
Likes
1,105
Location
Nebraska
You can always glue an insert of stabilized material into the wood piece that will take the threads. I have used Corian for this application on past work pieces, it readily accepts threads.
 
Joined
Jul 19, 2018
Messages
1,710
Likes
2,240
Location
Ponsford, MN
You can always glue an insert of stabilized material into the wood piece that will take the threads. I have used Corian for this application on past work pieces, it readily accepts threads.
So what is the point? Why mess around with inserts when it is possible using CA to prevent the crumbling that you get with many woods especially soft woods. The threads cut using CA do not separate due to seasonal movement, where as dissimilar woods or other non wood inserts may separate. Note: Wood seasonal dimension changes are caused by moisture changes where as metal and plastic dimension changes are related to heat. The other problem is attaching non wood inserts to wood, is that easier then soaking the main wood with CA?
 
Joined
Apr 5, 2011
Messages
353
Likes
187
Location
Delray Beach, FL
In attaching any dissimilar materials together you must account for the different expansion rates regardless of the method of fastening.

If using an adhesive the method is to leave a uniform gap between the materials and fill it with an adhesive that will allow for the expansion in shear or expansion or contraction. In circular items this means NO tight tolerances but a uniform gap filled with a suitable gab filling adhesive.

Yes, this requires more work then soaking, but not everyone can cut or chase threads.

I once had to fasten 1 meter diameter ceramic rings to aluminum rings to build a vacuum tight structure. It was placed in an area that had large temperature swings due to the HVAC system and due to the gap it worked well.

Stu
 
Joined
Jul 26, 2016
Messages
2,326
Likes
1,105
Location
Nebraska
I use Eclectic E6000 adhesive for that reason, it adheres to just about every material out there and it stays flexible and does get brittle.
I did several tests by gluing a Corian ring on top of a somewhat green bowl and the ring warped right along with the wood without breaking.
 
Joined
Jul 19, 2018
Messages
1,710
Likes
2,240
Location
Ponsford, MN
I know that most turners don't have the equipment to machine cut threads but I was hoping to attract comments from turners that have tried it.
The recent post of a photo of a nut and bolt box made on a rose engine lathe got me thinking that there were others out there doing it.
Please excuse me for maybe belittling inserts for threading.
 
Joined
Aug 16, 2015
Messages
3
Likes
59
Location
Burley, Idaho
Here is a picture of one of the thread chasers that I made for my for my #roseengine #lathe. It's on the far left of the barrel. I'm just figuring it out, but I'm happy with the results so far. I have a high speed cutter and turn the spindle over by hand.
 

Attachments

  • received_260966751973444.jpeg
    received_260966751973444.jpeg
    196.6 KB · Views: 41
Joined
Jul 19, 2018
Messages
1,710
Likes
2,240
Location
Ponsford, MN
There are lot of folks using the Klein and Baxter thread cutting jigs.
At the 1993 symposium after showing my prototype that had little chance of ever selling, Bonnie Klein talked to me about the various traits of my system verses her jig. The Klein style works and is affordable, but it has some limitations and problems. The screw that governs the thread pitch and advances the piece into the cutter is subject to backlash that gets worse with coarser pitch and the methods used to eliminate backlash can be difficult to get adjusted just right. The overhung load of a chuck and large turnings will severely limit the quality of the cut thread on the larger turnings. The Baxter jig is larger but still suffers from the same problems. Several years ago one of the members of my local club purchased the Baxter jig and tried to Demo it's use at a club meeting but the anti-backlash was so tight that he could barely turn it so he loosened it slightly and that caused vibration that ruined the thread.
 
Joined
Jul 19, 2018
Messages
1,710
Likes
2,240
Location
Ponsford, MN
Here is a picture of one of the thread chasers that I made for my for my #roseengine #lathe. It's on the far left of the barrel. I'm just figuring it out, but I'm happy with the results so far. I have a high speed cutter and turn the spindle over by hand.
Is the steel thread on the left of the picture the thread pitch?
 
Joined
Feb 8, 2014
Messages
1,178
Likes
613
Location
Evanston, IL USA
I have the Baxter from Bestwoodtools, and it works well. Unfortunately dealing with the owner can be a real PIA if you have a warranty issue.
Having two lathes to work on makes any kind of threading production work go a lot easier.
 

john lucas

AAW Forum Expert
Joined
Apr 26, 2004
Messages
8,333
Likes
3,585
Location
Cookeville, TN
I have the Baxter threader and the chef ware kits threader. They both work well. The Baxter is like using a Rolex and the Chefwarekits is like a timex. Both work. I also built a homemade.version first but it was just too sloppy.
 
Joined
Jul 19, 2018
Messages
1,710
Likes
2,240
Location
Ponsford, MN
I have been working on an idea for a lamp where I utilize a thin wall form similar to the cup on a goblet form.
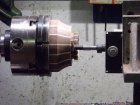
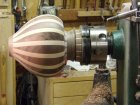
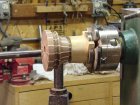
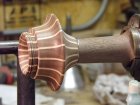
The lamp shade is held on with a 3/4" diameter arm with 1/2" - 8 male thread on each end and a 1/4" diameter hole through for the cord. The arm is threaded directly into the shade as in the 1st pic. The 2nd Pic shows cutting the 3/4" hex using a spin index fixture on my Bridgeport mill. The 3rd pic shows the setup on the wood lathe to clean up the faces of the nut. The 4th pic shows a little more detail of the mounting method and shows off a miniature hand screw clamp with screws 3/8"-8.

DSC00537.JPG DSC00545.JPG DSC00548.JPG DSC00551.JPG
 
Back
Top