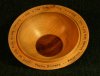
I turned a 12" Walnut platter today about 1/8" thick. I'm not sure how this happened (maybe something to do with the wobble in my lathe) but there is a spot just outside the edge of the tenon about 1/4" wide and 2" long that is paper thin and I sanded right thru the bottom of the platter. The thin spot does not go all around the platter, just the 2" wide spot. The actual hole is rectangular - about 1/4" x 3/4". I'm trying to come up with an idea of how to salvage the platter, I hate to think I wasted all day making a piece of firewood. I've thought about cutting a round plug and gluing it in but didn't think that would work well, given the thinness of the wood and probably wouldn't look too good either. I don't see how the hole could be filled with anything either. I'm thinking I would probably have to glue something over the hole. Other than the hole it's a pretty nice platter so I'd really like to save it from the scrap pile if possible. any ideas?

-
We just finished moving the forums to a new hosting server. It looks like everything is functioning correctly but if you find a problem please report it in the Forum Technical Support Forum (click here) or email us at forum_moderator AT aawforum.org. Thanks! -
Beware of Counterfeit Woodturning Tools (click here for details) -
Johnathan Silwones is starting a new AAW chapter, Southern Alleghenies Woodturners, in Johnstown, PA. (click here for details) -
Congratulations to Dave Roberts for "2 Hats" being selected as Turning of the Week for April 22, 2024 (click here for details) -
Welcome new registering member. Your username must be your real First and Last name (for example: John Doe). "Screen names" and "handles" are not allowed and your registration will be deleted if you don't use your real name. Also, do not use all caps nor all lower case.
You are using an out of date browser. It may not display this or other websites correctly.
You should upgrade or use an alternative browser.
You should upgrade or use an alternative browser.
Can this platter be saved from the scrap pile?
- Thread starter Jake Truxal
- Start date
Jake,
I have done that more than once. Trust me, it will happen to you again. I saved one by cutting through the plate, cutting another round piece and glueing it to the piece I saved, turned in down to match the rest and found , it still looks like CRAP. So I spray painted it with stone paint producing a modern decorator piece. It was no longer a beautiful cherry bowl but an interesting stone colored bowl that noone but me knew how it was derived.
You will come up with many fixes as you turn but they will always be fixes.
I was able to save ( pretty nicely) a 20 inch oak bowl that had cracked really big by epoxying the cracks and then carve leaves into the wood using the epoxied areas as shadows of the leaves. It might be one of my best fixes.
Just keep going and there will be many more days to turn nice walnut platters. Gary
odie
TOTW Team
- Joined
- Dec 22, 2006
- Messages
- 7,116
- Likes
- 9,818
Jake......
Gary is right......a fix is always a fix! You might be able to get away with it with someone who doesn't know wood lathes, but those of us on this forum have pretty sharp and experienced eyes for such things!
Won't hurt to try your fix......at this point, you've nothing to lose.
Here is a bowl that I blew through the bottom and fashioned a "T" shaped plug to fill the hole. The people who got this bowl were happy to get it, but to me.......it's always a big mistake! It wasn't a commission, it was a gift for a friend. If I'd have taken money for it, I would have eaten the mistake and done it over......
Try it......
ooc
Attachments

- Joined
- Jan 27, 2005
- Messages
- 12,898
- Likes
- 5,188
- Location
- Dalworthington Gardens, TX
- Website
- pbase.com
Sounds like a design opportunity for a pierced turning.
I feel your pain...sorry to hear about 'oops'. I agree with Gary and Odie. I've yet to see a patched bowl that didn't look exactly like a patched bowl.
I went through the bottom of a beautiful walnut crotch bowl a few years ago, so I decided to add a maple foot and use it as a plug for the hole. Because of the thinness of the bowl bottom, I could only get a feathered edge between the walnut and maple, and it was impossible to get a clean line. (At least with the turning skills I had at the time.) It looked horrible. So I decided to try filling the bottom with enough shallow layers of black gloss enamel paint to hide the patch. That also looked like crap. I had a smaller walnut bowl that fit into the bottom nicely, and made it look like a chip & dip bowl. But I couldn't glue the little bowl to the big bowl, because I had multiple layers of black enamel paint in the bottom. I finally gave up on it. My wife eventually put a bird's nest and some hawk feathers in the bowl, so at least you can't see the bottom anymore. You also can't see much of the nice crotch figure anymore, either.
The two or three bowls I've funnelized since then have been quickly set aside to make room on the lathe for another blank. I don't waste my time with them anymore. It hurts me to waste a good blank, but it hurts less than looking at a bodged bowl.
Just my 2¢ worth...
Last edited:
Two choices...set it aside for when you want to practice something like carving, dying, a new finishing process etc.
Or toss it and accept the educational opportunity it has already given you.
Or toss it and accept the educational opportunity it has already given you.
- Joined
- Apr 27, 2004
- Messages
- 8,638
- Likes
- 4,977
- Location
- Lakeland, Florida
- Website
- www.hockenberywoodturning.com
If you have an even wall thickness
consider making an inside cutout
pick some simple profile you like then use a scroll saw to cut the profile.
could be a maple leaf, alligator, or what ever
You will want to have a a backing board for the cut. a 1x2 with a v notch cut in the end. Do the sawing near the vee bottom so tha both sides of th cut are supported. cutting an 1/8 thick should be easy and quick
then hang it rim to the wall..
Al