Asked if I can make a few Kayak ornaments for a friend. I think I have the eccentric concept but not sure top would be turned based on a large round to have a fairly flat surface and bottom turned on a smaller circle to have more depth to the bottom. ends of the piece would have to be laid out for centers. further off low for the top of the Kayak and not as far up for the bottom arc of the kayak. Then it is a matter of not making the ends of the Kayak too small so the piece is not "set free" before desired. Can I accomplish this by using an independent 4 jaw chuck, or just by adjusting the centers. Seems it might be as fragile as a finial.
-
Beware of Counterfeit Woodturning Tools (click here for details) -
Johnathan Silwones is starting a new AAW chapter, Southern Alleghenies Woodturners, in Johnstown, PA. (click here for details) -
Congratulations to Keven Jesequel for "Big Leaf Maple" being selected as Turning of the Week for April 15, 2024 (click here for details) -
Welcome new registering member. Your username must be your real First and Last name (for example: John Doe). "Screen names" and "handles" are not allowed and your registration will be deleted if you don't use your real name. Also, do not use all caps nor all lower case.
You are using an out of date browser. It may not display this or other websites correctly.
You should upgrade or use an alternative browser.
You should upgrade or use an alternative browser.
Small Kayak ornament
- Thread starter Perry Hilbert
- Start date
Do it as a split turning, making two at once, using a paper/glue joint to consolidate the pieces. I would hold one end in a chuck for greater stability. Between centers would be challenging.
- Joined
- Apr 27, 2004
- Messages
- 8,629
- Likes
- 4,969
- Location
- Lakeland, Florida
- Website
- www.hockenberywoodturning.com
what I would is make them in pairs using a modified inside out technique.
For the top and cockpit take 2 jaws out of the chuck and clamp a 1x2x7 between the 2 jaws. Turn a rim 1/8” high and hollow the cockpit just a shallow bowl so you don’t cut through later. Smooth the rim into the surface toward the ends of the piece. Leave the last inch on each end unturned. Make 2 of these.
Then glue these two pieces together With the cockpits facing. Just put glue on the 1” sections at each end.
when the glue is set. Using all 4 jaws grip one end in the chuck an use the tailstock to center and Support the other end.
turn a curve from the center to a small point on each end. Point should be 1” from each end in the unglued area.
I often put a wrap of tape over the two pieces where I am not turning just in case I cut through
Leave the point about 3/16 thick.
You can use a fine saw to cut through each end.
Or take the two pieces turn the tailstock end to a point cutting the waist free.
The cut through at the chuck side remove the tape and you have two Stylized boats.
this makes a curved keel and flat deck. 4-5” long. You can modify dimensions.
if you want a Flatter keel. Take a look at @brian horais
https://www.aawforum.org/community/index.php?threads/creating-a-thermed-3-legged-stool.16273/
use the wheel turn the sides of the boats
Can you include some drawings. I’m not getting how you are doing this.what I would is make them in pairs using a modified inside out technique.
For the top and cockpit take 2 jaws out of the chuck and clamp a 1x2x7 between the 2 jaws. Turn a rim 1/8” high and hollow the cockpit just a shallow bowl so you don’t cut through later. Smooth the rim into the surface toward the ends of the piece. Leave the last inch on each end unturned. Make 2 of these.
Then glue these two pieces together With the cockpits facing. Just put glue on the 1” sections at each end.
when the glue is set. Using all 4 jaws grip one end in the chuck an use the tailstock to center and Support the other end.
turn a curve from the center to a small point on each end. Point should be 1” from each end in the unglued area.
I often put a wrap of tape over the two pieces where I am not turning just in case I cut through
Leave the point about 3/16 thick.
You can use a fine saw to cut through each end.
Or take the two pieces turn the tailstock end to a point cutting the waist free.
The cut through at the chuck side remove the tape and you have two Stylized boats.
this makes a curved keel and flat deck. 4-5” long. You can modify dimensions.
if you want a Flatter keel. Take a look at @brian horais
https://www.aawforum.org/community/index.php?threads/creating-a-thermed-3-legged-stool.16273/
use the wheel turn the sides of the boats
Can you include some drawings I’m not getting how your doing this.Do it as a split turning, making two at once, using a paper/glue joint to consolidate the pieces. I would hold one end in a chuck for greater stability. Between centers would be challenging.
Last edited by a moderator:
- Joined
- Apr 27, 2004
- Messages
- 8,629
- Likes
- 4,969
- Location
- Lakeland, Florida
- Website
- www.hockenberywoodturning.com
Can you include some drawings. I’m not getting how you are doing this.
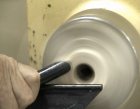
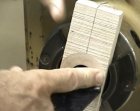
here a photos of small board for an ornament with a through hold held in a chuck with two jaws removed


Here is a side view cross section of the board held in the chuck to turn the cockpit.
Doing the drawing reminded me that a saw kerf at the 1” mark on each end is useful for keeping the glue from squeezing onto the deck of the boat. It also gives a visual reference for where the bow and stern are.

the two pieces positioned for glueing. Athebred shows the turned curve for the bottom of the kayak.

A pi
and that glue kerf, could be used a lot of different projects.
a picture is a thousand words. Thank you.here a photos of small board for an ornament with a through hold held in a chuck with two jaws removedView attachment 34814View attachment 34815
Here is a side view cross section of the board held in the chuck to turn the cockpit.
Doing the drawing reminded me that a saw kerf at the 1” mark on each end is useful for keeping the glue from squeezing onto the deck of the boat. It also gives a visual reference for where the bow and stern are.
View attachment 34817
the two pieces positioned for glueing. Athebred shows the turned curve for the bottom of the kayak.
View attachment 34816
and that glue kerf, could be used a lot of different projects.
